- Support home
- Usages
- Basic usage and user settings
- Organization management
- Buy with requests
- Sell to requests
- Banban Board
- Banban Board Tutorial — Basics
- Banban Board Tutorial — Calculation
- Messages
- Video meeting
- Shared files
- OneShot Demo Video Recorder
- Ban list
- Common
- FAQ
- Limitations and issues
- H-Market model
- Supported browsers
- Contact
- Free and options
- Paid options
- Land domain names
- Sellers
- Banban Board
- Paid options
- Promotion materials
- Identity verification
- Legal
- Terms
- Privacy policy
- Logging setting
- SCT
- Content Creation Guidelines
Basic usage and user settings
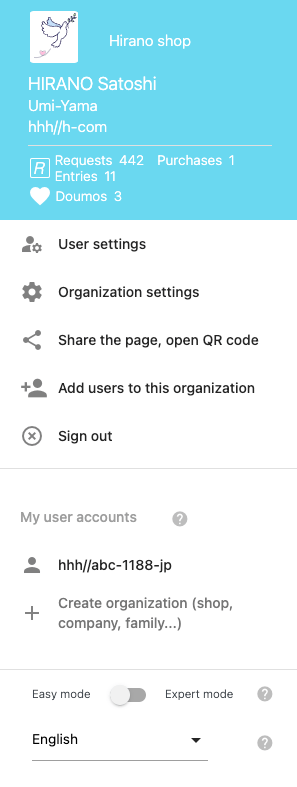 User menu
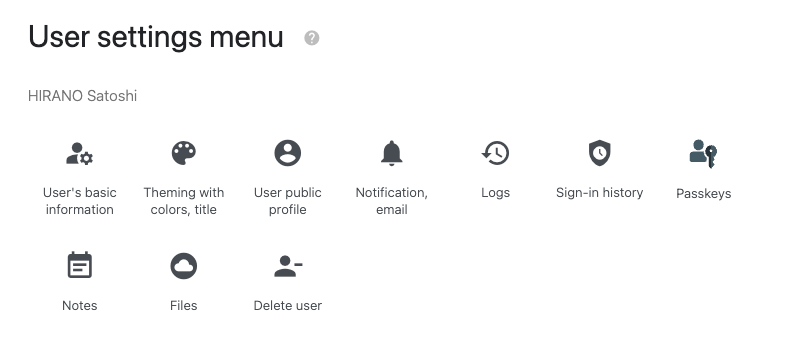 User settings menu
-
person Sign up (User registration and organization creation)
On Requestland, every user belongs to one or more "organization(s)." You can either create a new organization yourself or join an existing one created by someone else.
An organization is like a home. For example, if you are in an organization with family or friends, users within the organization can share data such as requests, Banban Boards, notes, and shared files, and enjoy shopping together. You can also create your own organization and use it alone.
In a company organization that sells products, you can add employees as users of the organization and work together.
To join an existing organization, ask the organization's administrator for a link or QR code for adding you. You don't need the following registration procedure. Refer to "Join an existing organization" for more detail.
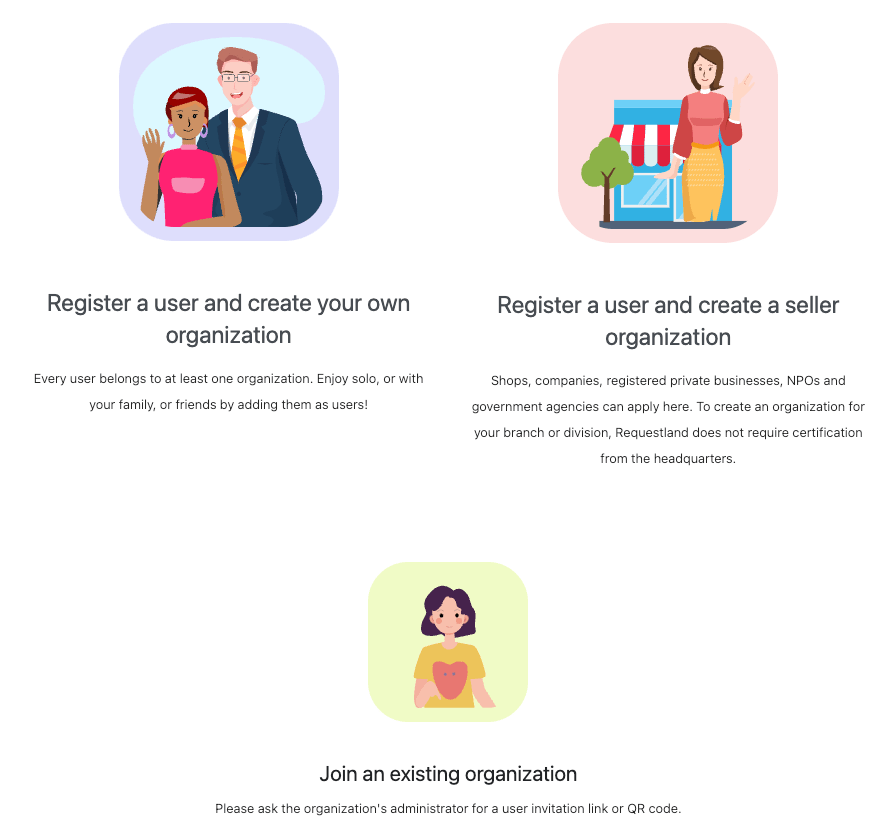 Sign up entrance
To create your user account and organization, press the "Sign up" button at the top of the Requestland web app (this button will not appear on devices where you have already signed in). Then press "Register a user and create your own organization" or "Register a user and create a seller organization." A page like the one below will open.
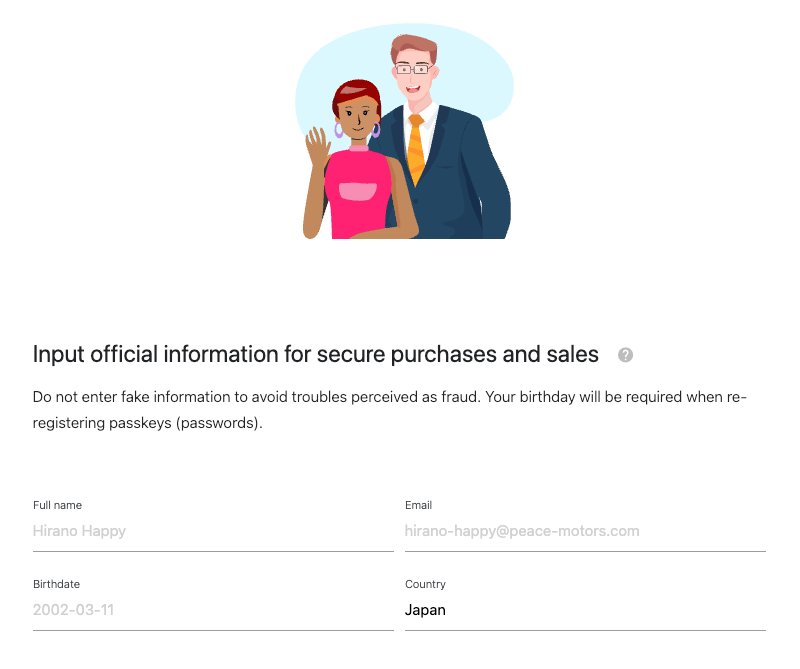 Entering Name and Birthday
For secure purchasing and selling, please enter official information. The language of the name (such as English) should match the identification document. To avoid troubles and being mistaken for fraud, entering unofficial information is prohibited. You can set a nickname in your Public profile after signing in.
The birthdate will be used to verify your identity when re-registering a passkey (an alternative to passwords). Please do not enter a name or birthdate that differs from your identification document.
Specify the country of issuance of your identification document or your primary residence. Please correct if the default value is incorrect. The languages and currencies used for Requests, the Banban Board, and Notes are set based on this country, but you can add or change them in"User Information" after signing in.
Enter an email address where you can receive a confirmation email. You will receive notifications about new messages, abuse of your user account, changes in user information, and more. Additionally, email verification is required when recreating a passkey. After signing in, you can set whether to display notifications and whether to receive them by email on the "Notification, email" settings.
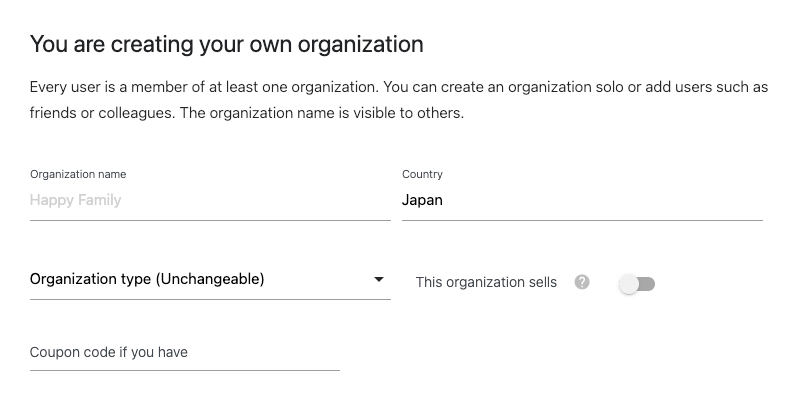 Enter Organization Information
Enter the organization’s name, country, and type. If the organization will be engaged in sales or provide things for a fee, turn on "This organization sells". Specify the country where the organization's headquarters is located. For sales organizations, specify the country where the headquarters is located and where documents for verifying organization information are issued. Please correct if the default value is incorrect.
The fees for Paid options are adjusted according to the cost of living in each country, so the fees will vary depending on the country specified. Also, the country code included in the Land ID shown below indicates the country specified here. If you specify a country different from the one where the organization's headquarters is located, it will be considered fraudulent and subject to penalties.
If you have an unused coupon code for Requestland, please enter it. If you obtain a coupon code later, you can also enter it from the "Usage and options" menu in the organization settings menu.
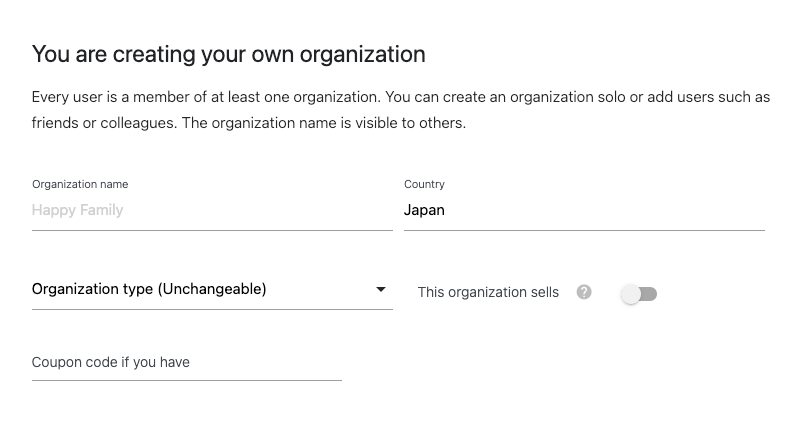 Enter Land ID
On Requestland, the user ID used for sign-in and messages is called "Land ID." It is in the format of "name//land-domain-name", such as "hirano-happy//peace-motors". Enter your organization's brand or preferred text in the Land domain name field and press "Check availability."
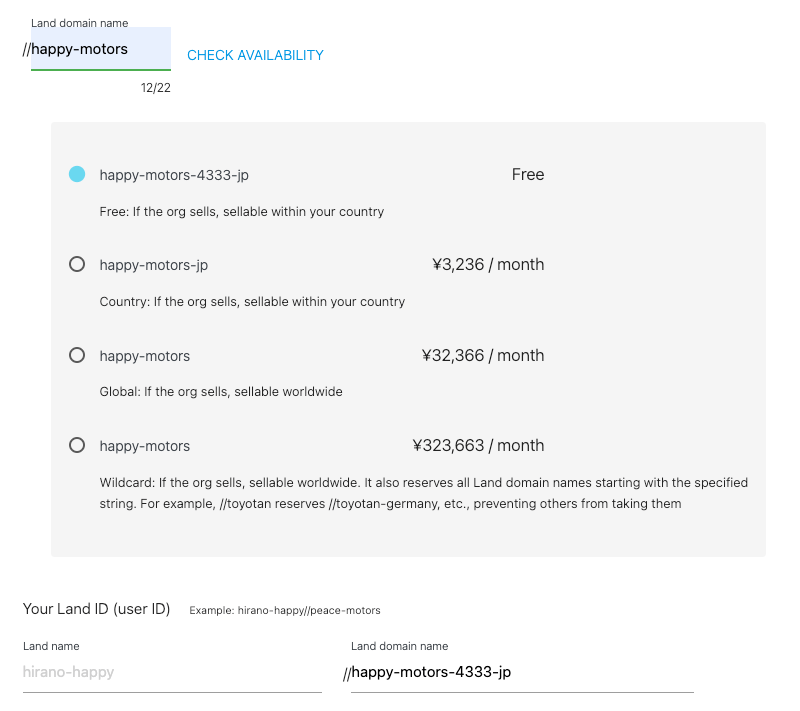 Selecting Land domain name
As shown below, choose one of the available Land Domain Names that match the entered text.
- happy-motors-6861-us
- Free: Random numbers and country code are appended. Sales organizations can sell only within the country.
- happy-motor-us
- Country: Country code is appended. Sales organizations can sell only within the country.
- happy-motors
- Global: Sales organizations can sell worldwide.
- happy-motors
- Wildcard: Sales organizations can sell worldwide. It also reserves Land domain names starting with specified characters. For example, //toyotan reserves //toyotan-germany so others cannot take it.
The amount is the monthly fee for using the specified Land domain name in the organization, which is the main operating cost of Requestland. The more characters and the less frequent the words, the cheaper it becomes. Characters that resemble country codes cannot be appended. This fee does not change even if the number of users in the organization increases.
It is on a first-come, first-served basis. If another company or person takes your brands, you won't be able to transfer them. Since it is not related to Internet domain names, owning internet domain names do not affect this. We recommend securing your brands for your organization (and also your position!) as soon as possible. After signing in, you can also secure additional Land domain names in "Usage and options" in the organization settings menu.
Land domain names similar to existing trademarks cannot be taken. A trademark is a system where, for example, if someone registers the text "Great car" in your country under the "car" category, others cannot use that text for the same category of business in that country. A slightly different text like "Greaty car" may be considered infringement if the impression is the same. For Global or Wildcard Land domain names, it is necessary that there are no existing trademarks in the category of business you are operating in across all countries.
Please search Global Brand Database in advance and exercise caution to avoid infringement. You can refer to Internet Domain Name Dispute Resolution Policy.
Note that the transfer of Land domain names and organizations is prohibited. Peace and Passion will not be responsible for any disputes related to Land domain names.
The fees change slightly and monthly due to domestic price fluctuations (inflation) and exchange rates. The fee for Country is adjusted according to the cost of living in each country, so it is higher in rich countries and lower in less rich ones.
Next, enter the Land name part representing you personally. For organizations like companies, names including last names and first names are appropriate.
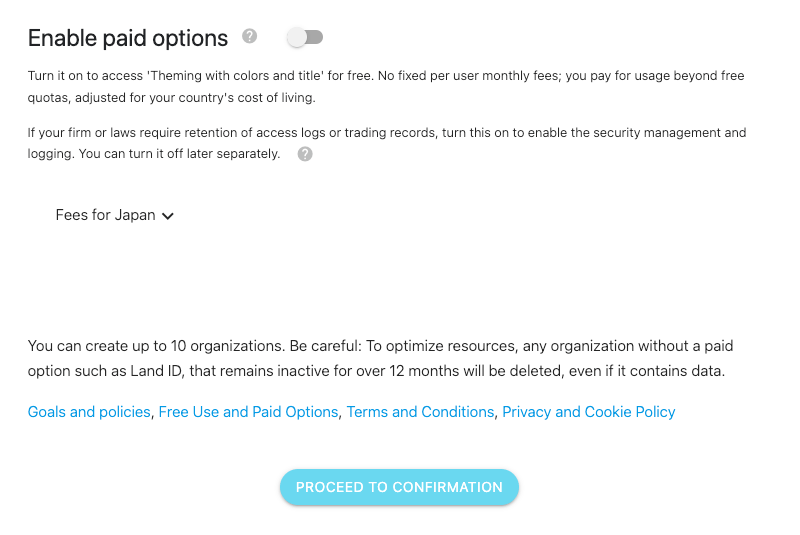 Paid option switch
Most features in Requestland are available for free, but if you use more than the Free tier, you will need to turn on Paid options.
There is no monthly fee per user, and it is a pay-as-you-go system based on usage exceeding the free tier. While services like $8 per user per month are common, Requestland can be started for as low as 80 cents per month for the entire organization. Press "Fees for your country" to view the list of fees.
Additionally, when turned on, you can use the free and fun "Theming with colors and title" and "Expert mode" to have multiple projects. If you stay within the free tier, no charge will occur.
The usage fees are adjusted according to the cost of living in each country; it is higher in rich countries and lower in less rich ones. They change slightly and monthly due to domestic price fluctuations (inflation) and exchange rates.
Important: For companies and organizations, many countries have legal or internal regulations that require the retention of transaction and access logs for about 3 to 7 years. Please enable Paid options and activate the Security management option. Logging will begin, and auditing will be possible. You can also disable the Security management option later. Depending on the settings on the "Security" page, logs can be retained from 1 year to 10 years, with charges based on the amount of logs stored. The default retention period is 5 years.
Press "Proceed to Confirmation," review the information, and then press "Agree and Register."
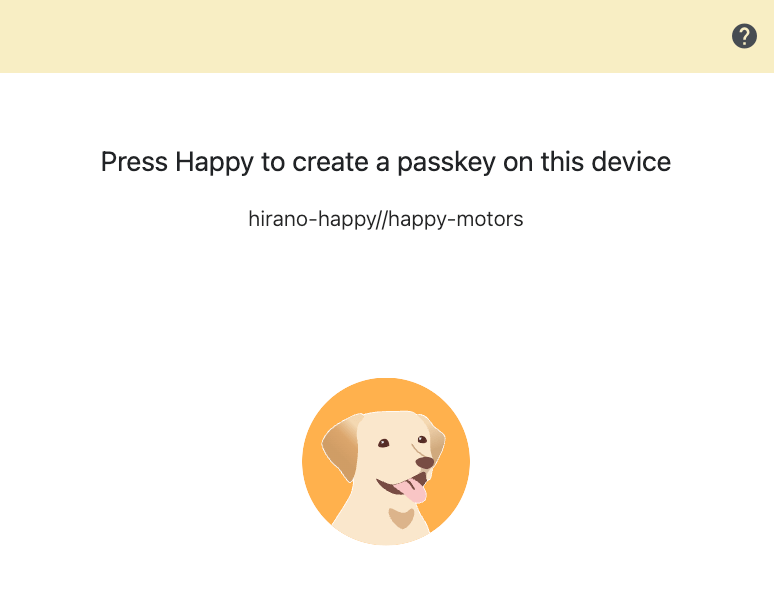 Page for creating a passkey
A confirmation link will be sent to your email address. Open the page from the confirmation link and press Happy-kun's button. Your organization, user account, Land ID, and passkey for sign-in (replacing the password) will be created, and you will be signed in. Additionally, you will be the first user and administrator of that organization. The confirmation link is valid for 20 minutes. If it expires, please try again.
In Chrome, you can choose to create a passkey in the Google Password Manager or in your OS’s default system, such as iCloud Keychain or Windows Hello. Decide whether you want to share the passkey with your iPhone (→ iCloud Keychain) or with your Android device (→ Google Password Manager). You won’t be able to change this later.
After signing in, if you want to add (invite) other users to the organization, press "Add users to this organization" in the user menu at the top right.
For the detail on managing the organization as an administrator, refer to Organization management.
For organizations involved in sales or offering paid services, or government organizations, Setup is available after signing in. Please follow the instructions to add users, set up receivers, etc. Additionally, for safety reasons, organization information and verification of one user will be conducted.
In order to efficiently use resources, an organization will be deleted after 4 months of inactivity or non-payment for Land IDs or other paid options, even if data still exists.
-
person_add Join an existing organization
To join an existing organization, ask the organization's administrator for an invitation link or QR code for adding you. Its expiration time is 24 hours.
If you are inviting other users to your organization, press "Add users to this organization" in the user menu to add users.
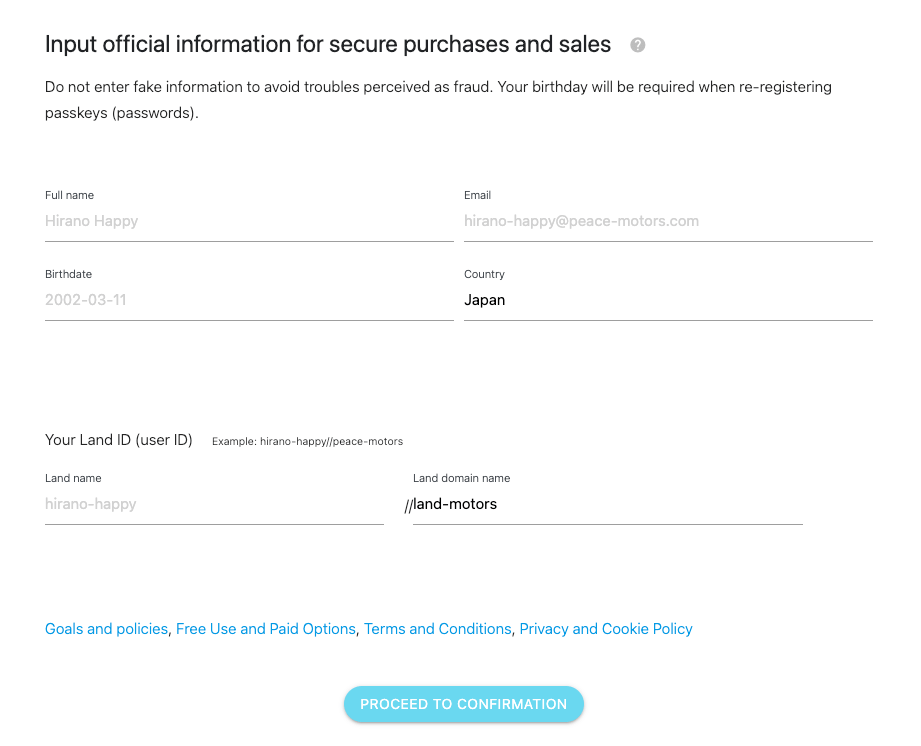 Invitation link page
When you open the invitation link, a page like the one above will appear. For secure buying and selling, enter official information. To avoid trobles and being mistaken for fraud, entering unofficial information is prohibited. Your birthday will be used as proof of identity when re-registering passkeys (password alternatives). Do not enter a name or birthday that doesn't match your official ID. You can set a nickname in your public profile after signing in.
In "Email", enter an email address where you can receive the confirmation email. If the administrator of the organization does not require an email address, it will say "Email - Input recommended to get msgs", and entering it is not mandatory. However, if you do not enter an email address, you will not be able to receive notification emails such as new messages, abuse of your user account, or changes to user information, so it is recommended to enter it. Also, email verification is required when re-creating passkeys. After signing in, in the 'Notifications, Email' settings, you can configure whether to display notifications on the screen and whether to receive them via email.
On Requestland, the user ID used for sign-ins and messages is called a "Land ID". It follows the format name//land-domain-name, like hirano-happy//peace-motors. Please enter the name part. For organizations like companies, a name that includes both surname and first name is appropriate.
Press "Proceed to Confirmation", review your input, and then click "Agree and Register".
 Create passkey and join
If you did not enter an email address, you can sign in to the organization by clicking the Happy button that appears.
If you entered an email address, a confirmation link will be sent to that email address. Open the page with the confirmation link, and click the Happy button to sign in to the organization. The confirmation link is valid for 20 minutes. If it expires, please try again.
At this time, a passkey for your Land ID will be created. Going forward, use this passkey to sign in to the organization. We don't use a password. For details, refer to Sign In (Log In).
In Chrome, you can choose to create a passkey in the Google Password Manager or in your OS’s default system, such as iCloud Keychain or Windows Hello. Decide whether you want to share the passkey with your iPhone (→ iCloud Keychain) or with your Android device (→ Google Password Manager). You won’t be able to change this later.
-
login Sign In (Log in)
To use Requestland, first click Sign in at the top right and sign in with one of your Land IDs and its corresponding passkey.
You can sign in with different accounts in multiple tabs at the same time. However, signing out in one tab will sign you out in all tabs.
What is a Land ID?
On Requestland, the user ID used for signing in and messaging is called a "Land ID." It follows the format of name//land-domain-name, such as hirano-happy//peace-motors. You make your Land ID when you register as a user or joined an existing organization. The Land ID is also included in the email you received during user registration.
If you belong to multiple organizations, you have a Land ID for each user account. Land domain names can be free or paid, with free land domain names including numbers and country codes.
Signing in with a passkey
Passkeys are encrypted digital keys. You can sign in using your Face ID, Touch ID, or PIN without needing a password. There's no need to remember a password, and it's more secure against theft. You only store the public key parts of your passkeys to the Requestland server. Passkeys are supported on relatively new devices that meet conditions such as being logged in with an Apple ID (iCloud), Google ID, or Windows Hello, and having screen lock enabled. These OS venders manage your passkeys.
Click the Sign in button at the top right corner of the screen, and a login screen will appear as shown in the figure. If the desired Land ID is displayed on the large central button, simply press that button. You can sign in using the passkey corresponding to the Land ID through touch ID, face recognition, or the device's PIN.
If you haven't signed in before on this device and see the large "Create passkey" button, refer to How to create passkeys.
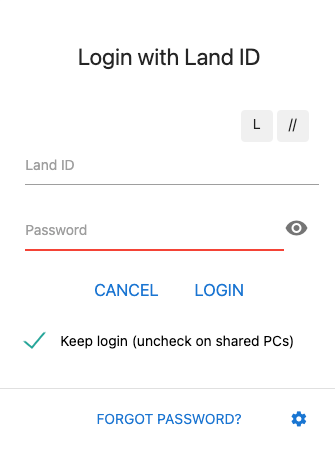 Sign-in dialog
Apple and Google devices support passkey synchronization, allowing you to sign in on any device.
Your sign-in status will be maintained for long time, so you generally won't need to sign out during that period.
If your device doesn't have the desired Land ID's passkey
Signing in with a different Land ID
Press "Select passkey or from another device" to select the desired Land ID.
Signing in on your device while borrowing a friend's device
Press "Select passkey or from another device" and select "Use passkey from another device." A QR code will be displayed, which you can scan with your device to sign in. Bluetooth connection will be required at this time.
If the "Sign-In screen" and QR code appear when launching or operating Requestland
If you haven't signed out and have deleted all passkeys from the device's password manager, a QR code may be displayed. This happens when the device (OS) asks the user whether to use a passkey from another device due to the absence of any passkey on the device.
Cancel the QR code screen and sign out Requestland from the user menu. This will stop the QR code screen from appearing.
Press the Sign in button and create a passkey from "Create passkey."
-
check_circle_outline Create passkeys
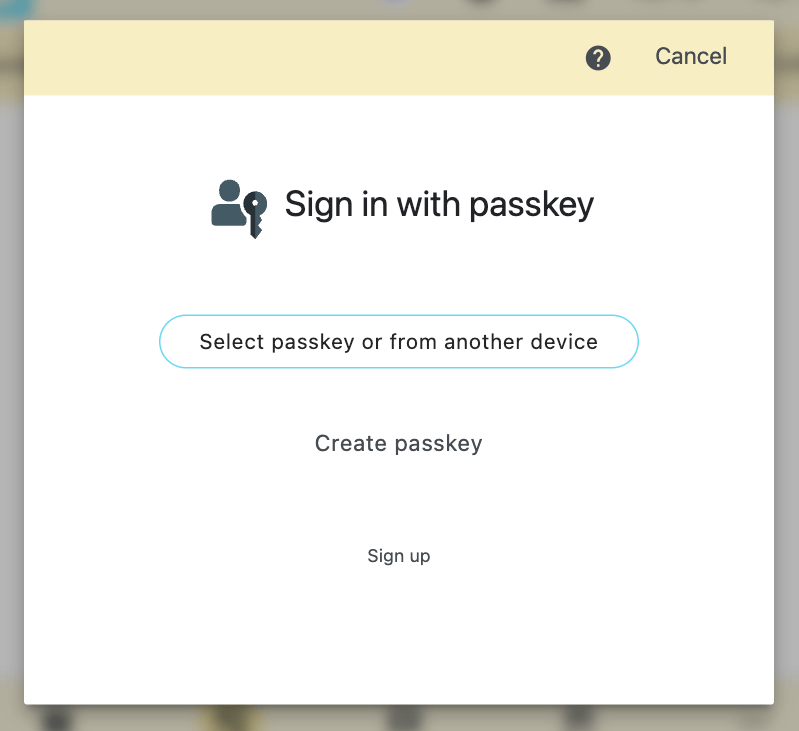 Sign-in dialog: No previous sign-in
If your device doesn't have the desired Land ID's passkey, or if you lose your device, or if you're using a device that doesn't support passkey synchronization, like Windows, press the "Create passkey" button on the sign-in screen and enter your Land ID.
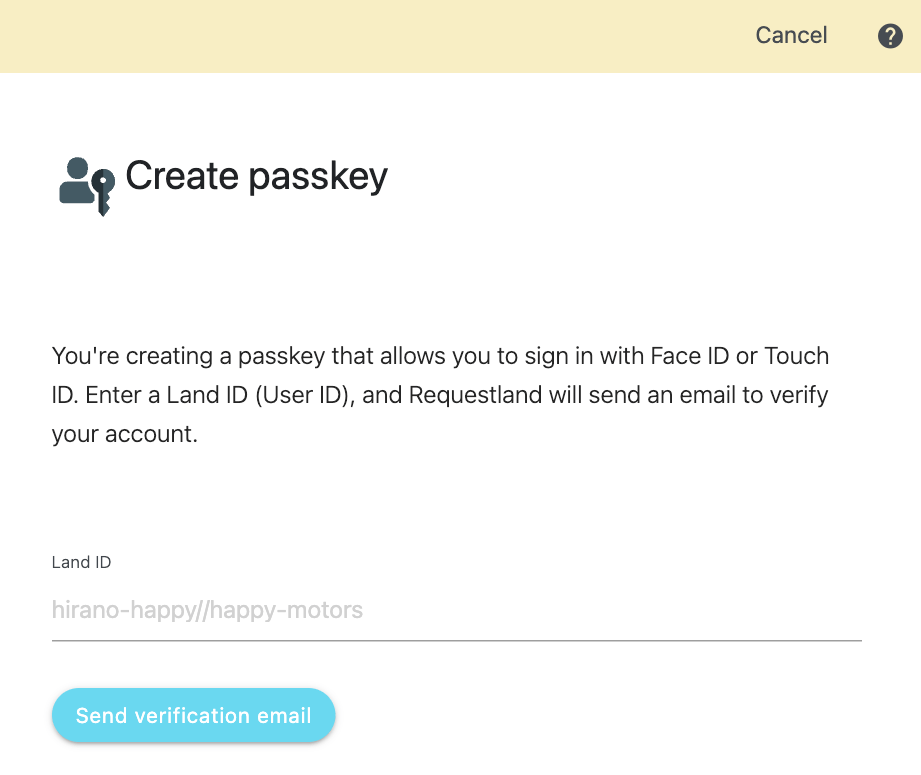 Create passkey
Passkeys are encrypted digital keys. You can sign in using your Face ID, Touch ID, or PIN without needing a password. There's no need to remember a password, and it's more secure against theft. You only store the public key parts of your passkeys to the Requestland server.
Browser: An authentication link will be sent to your registered email address. Open that link in the same browser, enter your birthday, and press the Happy button. A passkey will be created and you will become signed in.
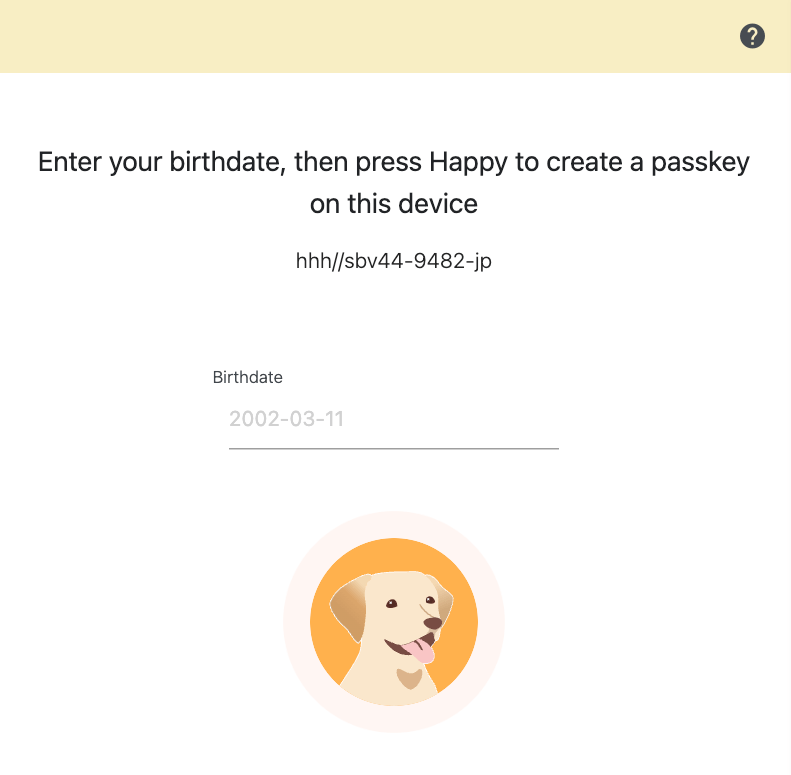 The page with the confirmation link
Requestland app: A verification code will be sent to your registered email address. enter the verification code and your birthday, and press the Happy button. A passkey will be created and you will become signed in.
If you haven't registered an email address when creating your user account in the organization, first ask the organization administrator to register your email address to your user account, then proceed with "Create passkey" as described above.
Contacting Peace and Passion will not allow you to reset your email address or passkey.
In Chrome, you can choose to create a passkey in the Google Password Manager or in your OS’s default system, such as iCloud Keychain or Windows Hello. Decide whether you want to share the passkey with your iPhone (→ iCloud Keychain) or with your Android device (→ Google Password Manager). You won’t be able to change this later.
-
logout Sign out (Log out)
Your signed-in session is kept for a long time, and in general you do not need to sign out.
When you select Sign out from the user menu, your session ends and the browser’s internal data such as cookies are cleared. If you have Requestland open in multiple tabs, signing out will sign you out from all of them.
About cookies
After signing out, only two types of cookies remain: the device identifier for the Land ID you last signed in with, and the device identifier used by the payment provider (Stripe). Stripe’s cookies are used for fraud detection and it is normal for them to remain.
Requestland does not use Google Ads or Google Analytics, but it does use Recaptcha to detect Bot access. Because of this, Chrome automatically uses cookies under the
.google.comdomain. Safari and Firefox do not use these cookies. -
location_on Enabling location service
Requestland is a map based app. sellers/providers require to provide location information for locality aware transactions and improving local economies. When you are asked for permission for location information, press "Permit". Or, permit the use of location information on the browser and the OS.
When location information is not available, it estimates your location from IP address. However, the accuracy of the estimation is low, you might have troubles during use.
Permit on the browser.
- Microsoft Edge
- Chrome on Android
- Chrome on Desktop
- Chrome on iPhone & iPad
- Safari on Mac
- Safari on iPhone and iPad
And permit on the OS.
-
get_app Install Requestland app on the home screen
Requestland icon with badgeOnce you add Requestland to your home screen or Dock as an app, you can open it directly from the app icon.
In your browser, open Requestland (any link starting with https://request.land/(n_n)v is fine), then choose “Add to Home Screen” or “Install this page as an app.” Please watch the videos below for device-specific instructions.
Be sure to do this from a page with a link starting with https://request.land/(n_n)v. If you do this from explanation or help pages (starting with https://request.land/help), the screen may briefly flicker due to a redirect when the app launches.
To ensure you receive on-screen notifications and see badges on the app icon when messages arrive, an “Enable notifications” button will appear at the top of Requestland. An explanatory video will be shown, so be sure to enable notifications. For details, see Notifications and Email.
On a Mac, it is recommended to install Requestland using Safari. With Safari, badges are displayed even when Requestland is not running, while in Chrome, badges are updated only when the app is running.
Android expand_more-
Chrome: Press "Add to Home Screen" from the right menu button of the address bar. Or, press OK if "Add Requestland to home screen" is displayed. The app badge displays the number of unread notifications.
iOS expand_more-
Safari: Press "Add to Home Screen" on the share button.
Even if the app is not running, banner notifications and unread badges will still be displayed.
- Chrome: Use Safari because Chrome on iOS does not support "Add to Home Screen".
Windows expand_more-
Edge: Press Install button on the navigation bar. Notifications are displayed even if the app is not running. The badge on the app icon is displayed when the app is running.
-
Chrome: Press Install button on the address bar.
Notifications are displayed only when Chrome or the Requestland app is running. The badge on the app icon is displayed when the app is running.
Mac expand_more-
Safari: On macOS 10.14 Sonoma or later, From the menu bar, choose File > Add to Dock. Or press the Share button in the Safari toolbar, then choose Add to Dock.
Notifications are available on Safari 17.1 or later. When you sign in, a notification settings banner will appear in the top right corner of the desktop, so please allow it.
To enable notifications later, open System settings > Notifications > Requestland, and then turn on Notifications.
On Safari 26 or later, the app icon badge is updated when a notification is received. The badge will appear even if the app is not running, but unless there is a new notification, it will not update until you launch the app, even if the message is marked as read on another browser or device.
On Safari versions earlier than 26, the app icon badge is only updated while the app is running.
On macOS 10.13 or before, use Chrome.
-
Chrome: Press Install button on the address bar.
Due to a bug in Chrome on macOS, there is an issue preventing passkey authentication, user registration, and organization creation in apps installed via Chrome. As a temporary workaround, passkey authentication occurs in the browser. There is no such issue in the app installed via Safari.
In the case of Chrome, you need to keep the app up and signed-in to receive the notification.
-
Chrome: Press "Add to Home Screen" from the right menu button of the address bar. Or, press OK if "Add Requestland to home screen" is displayed. The app badge displays the number of unread notifications.
-
list Lists
On Requestland a page consists of a list of items and a view of each item typically. You can manipulate them using common techniques. This is a list.
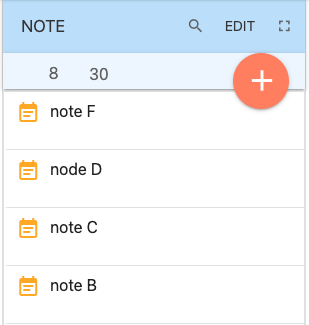 List
List
- To add an item to the list, press the + button, write the content, and press the Done button.
- Press the fullscreen full-screen button to switch to full-screen mode. Press it again to return to normal.
- Search is enabled when the search icon search appears. The search panel will appear, so enter your search keywords and conditions and press Search. Full-text search is only available on some lists.
- The search panel will display two numbers, such as "8 30." The first number is the number of items loaded. If there is "+more," such as 30+more, it means there are more items on the server. Scroll to the bottom of the list or tap this number to load more items from the server. The second number is the number of items loaded at one time; you can tap to change it.
List updates
Some lists including Messages, Banban Boards, Requests, Receivers, and Entry lists, if you have "Users who will receive notifications" enabled in the project settings, new items added to the list will automatically appear. Messages and Requests lists will be marked as unread. For projects with notifications disabled, the list will not automatically refresh.
For other lists, the list will not automatically refresh or be marked as unread. You can refresh the list by reopening it, clicking the list title (NOTE in the above figure), or pulling down the list (pull to refresh).
Edit mode and deleting items
To delete items, press the EDIT button to enter the edit mode.
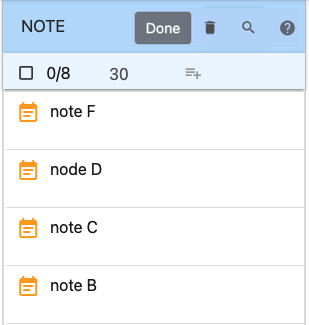 Editing list
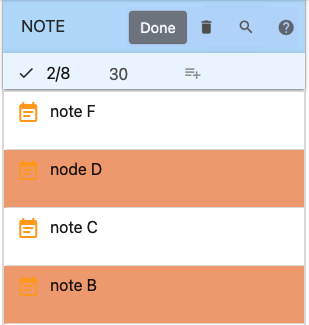
Then press items to select. Press again to unselect. Some items might functino as filters, so select an item that doesn't act as a filter, like a date. Then press the trash button delete to delete. They will never come back. To finish the edit mode, press Done.
Press the select all buttoncheck_box_outline_blank to select all items. Press check button to unselect all. To delete all items in a list, firstly set the number of items to be read at max, secondly select all items, then delete the selected all items, repeat.
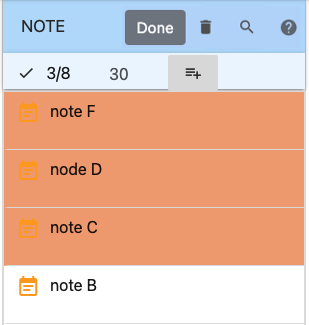
By pressing playlist_add button, you will enter a modeplaylist_add that you can select contiguous items at once. Press the first item and the last item to select. You can use shift key to do so as well.
See also When you accidentally delete an item.
-
view_list Item views
In a list, select an item to show its content in an item view.
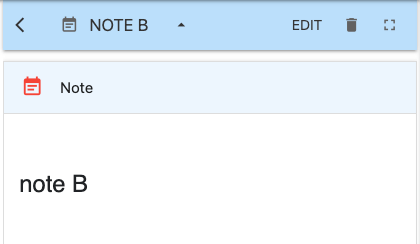 Item view
- Press the title of the view (NOTE on the above view) to reload it.
- Press the blank to the right of the title to show only sub titles and hide contents. It is a quick way to move to the top of the page or jump to a specific item. Press again to show all. If you press a subtitle, that hides its content.
- Press fullscreen buttonfullscreen for full screen. Press again to return.
- If you see arrow_left and arrow_right on the left and right, press them to display the next item.
Press the Edit button to edit the content. The Done button sends it to the server.
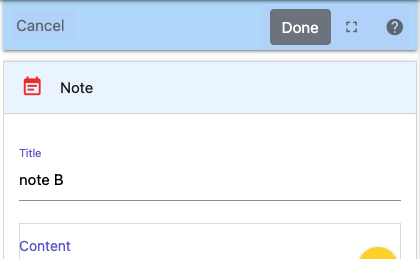 View in editing
- Sometimes the item has been edited and saved by somebody else. In that case an error is shown in order to avert overwriting. Copy what you wrote to somewhere, press the CANCEL button, then edit it again.
-
dashboard_customize Sub-view
The Sub-view feature allows you to send messages while viewing the Banban Board, create notes while checking messages, or operate the Banban Board during a video meeting. The screen is split into two, enabling you to use two views simultaneously.
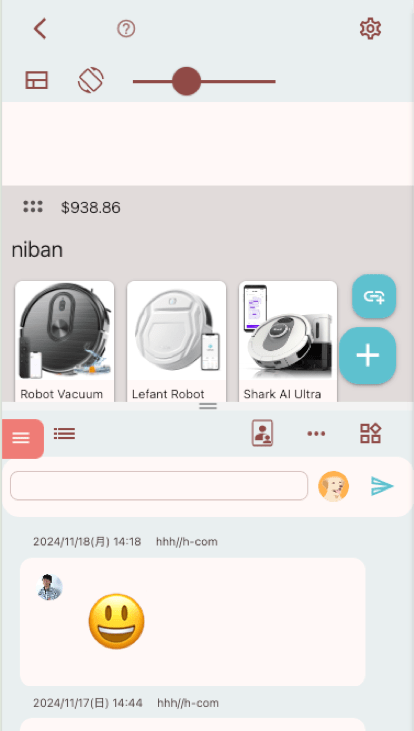
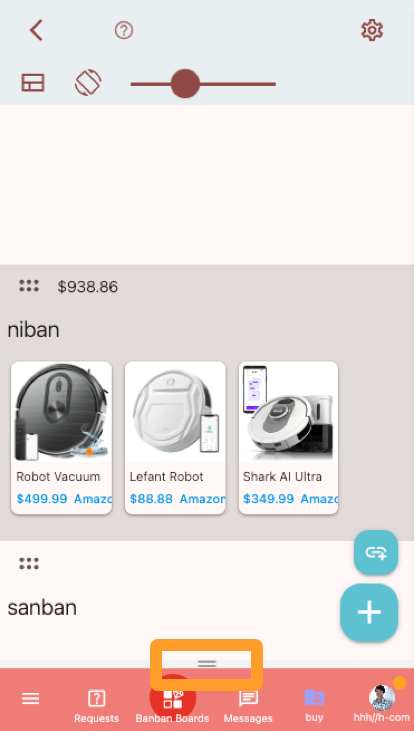
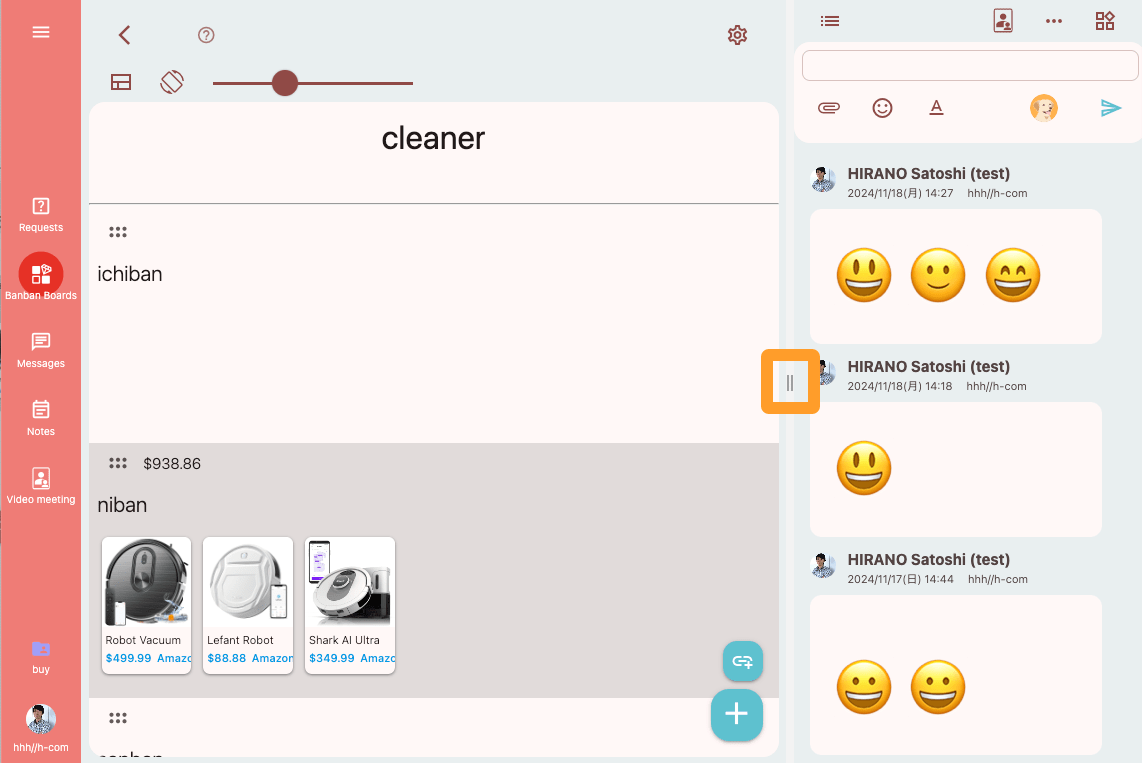
To open the Sub-view, tap the silver handle drag_handle located on the right or bottom of the Requestland screen. Tap it again to close it. You can also drag the handle to adjust the size of the Sub-view. On portrait-oriented smartphones, the Sub-view appears at the bottom of the screen, while on landscape screens or desktops, it appears on the side.
To switch menus, tap the dashboard_customize (Sub-view) icon in the top right corner of the Sub-view and select the desired menu.
To switch displayed items, tap the list (List) icon in the top left corner of the Sub-view and select an item from the list.
When using the Sub-view on an iOS device, the OS's "Reachability" feature may activate and cause the screen to lower halfway. To disable this feature, go to "Settings" > "Accessibility" > "Touch," and turn off "Reachability."
The same menu cannot be opened simultaneously in both the Sub-view and the Main View.
Floating sub-view
In some desktop browsers, such as Chrome and Edge, pressing the branding_watermark button in the upper right of the sub-view will turn the sub-view into a separate window and be always displayed in the foreground. This allows you to display a transcript during a video meeting or recording, or use the window more spaciously.
To exit floating, press the "Back to Tab" button in the upper right.
Floating subv-iews are experimental and have several issues. For example, opening and closing a dialog inside them will cause them to stop scrolling. Please try floating them again or reload Requestland. Also, floating sub-views are read-only.
-
manage_accounts User's basic information
In User's basic information page in the user settings menu you can confirm and change information such as login settings, name, and address.
Press the Edit button to edit. Any information except country and region is not public. Type correct information including name and birthday that match your identity card and credit cards. Some items such as birthday cannot be changed.
While the information is not public, some of the items are visible in your organization. Organization administrators can view and change many items.
Refer to the following items for your language and currency settings.
You are encouraged to register a backup email address in case you lose access to the main email.
Opening the User menu reloads the user settings, organization settings, and user profile. If you open the User menu while editing any of these, your changes will be canceled.
-
language Select a language for screen display
Requestland has two language settings: the language used for screen display (English/Japanese) and the language used for requests and Banban Boards (more than 30 types). This section describes the language displayed on the screen. For language settings in Requests and Banban Boards, see next section below.
At the bottom of the user menu, you'll see the language you're currently using for the screen display. Press this to change the language for screen display.
You can also change it in the "Display language" on the user's basic information page.
-
attach_money Manage languages and currencies you use in requests, Banban Board, and notes.
You can use more than 170 currencies and more than 30 languages in requests, Banban Board, and notes, while display languages are only two.
To avoid to choose from such many choices, you need to choose your favorite ones in "Languages you use in requests and Banban Boards" and "Currencies you use in requests and Banban Boards" on the "User's basic information" page in advance. If your preferred language isn't listed, choose "Others".
When you create a request or a receiver, you can choose one from the selected ones.
If you don't have a language you just added in the language selector on a page, visit another page, return to the the page, then choose the language.
-
color_lens Customize app color, title, and background image
On the "Theming with colors, title color_lens" page, you can customize the theme by selecting colors, background images, and titles. Switch between light and dark modes, and set your preferred theme for each.
Organization administrators can open the "Theming with colors, title color_lens" page from the organization settings, to set a theme for the entire organization from organization settings, allowing them to update the colors and titles for all users at once. They can also display a company name or a fun slogan. If both are specified, the user settings take precedence.
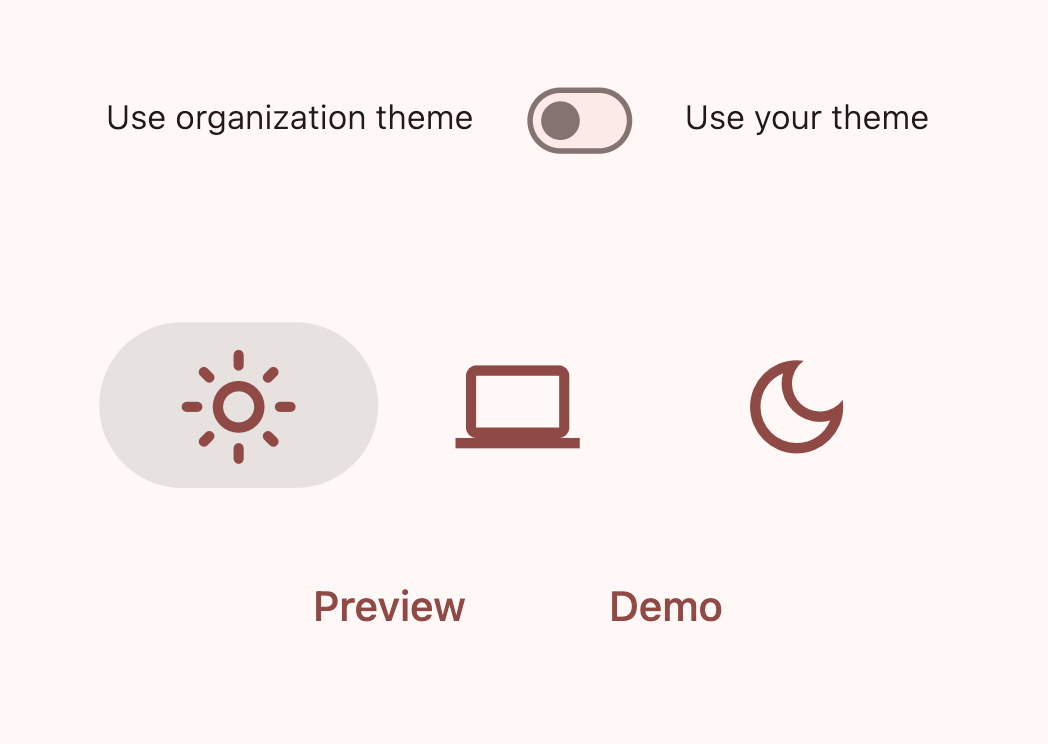
The user can open the "Theming with colors, title color_lens" page from the user settings, and by turning on "Use your theme," they can customize the theme according to their preferences.
Pressing Preview opens a small dialog where you can see how the theme will look when applied.
Pressing Reset will restore the default colors.
Pressing Demo will start demonstration. Press it again to stop.
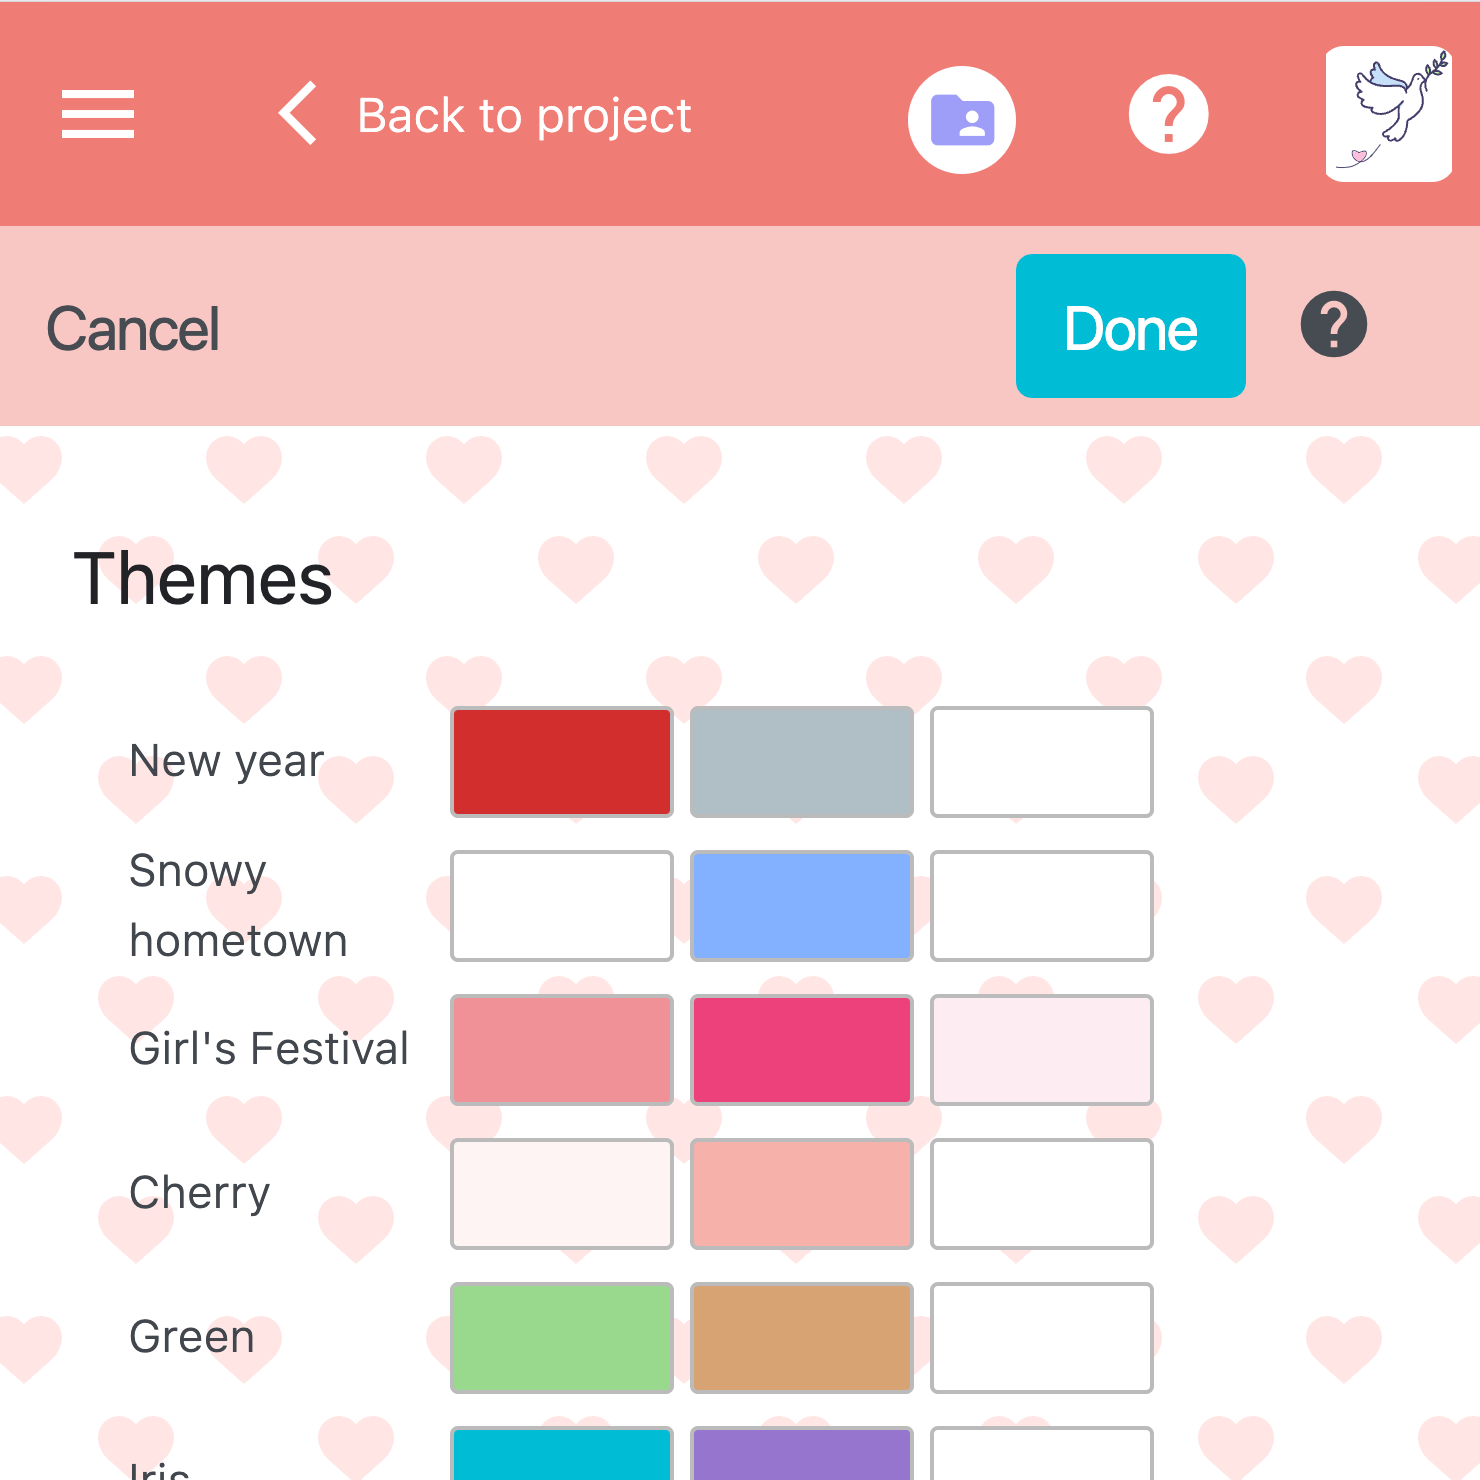
- Theme: You can apply custom colors to the menu bar, buttons, background, and menu bar text. Additional colors are selected from an automatic color scheme based on the menu bar color. Our recommendation is 'Miss Branche' and 'Default'.
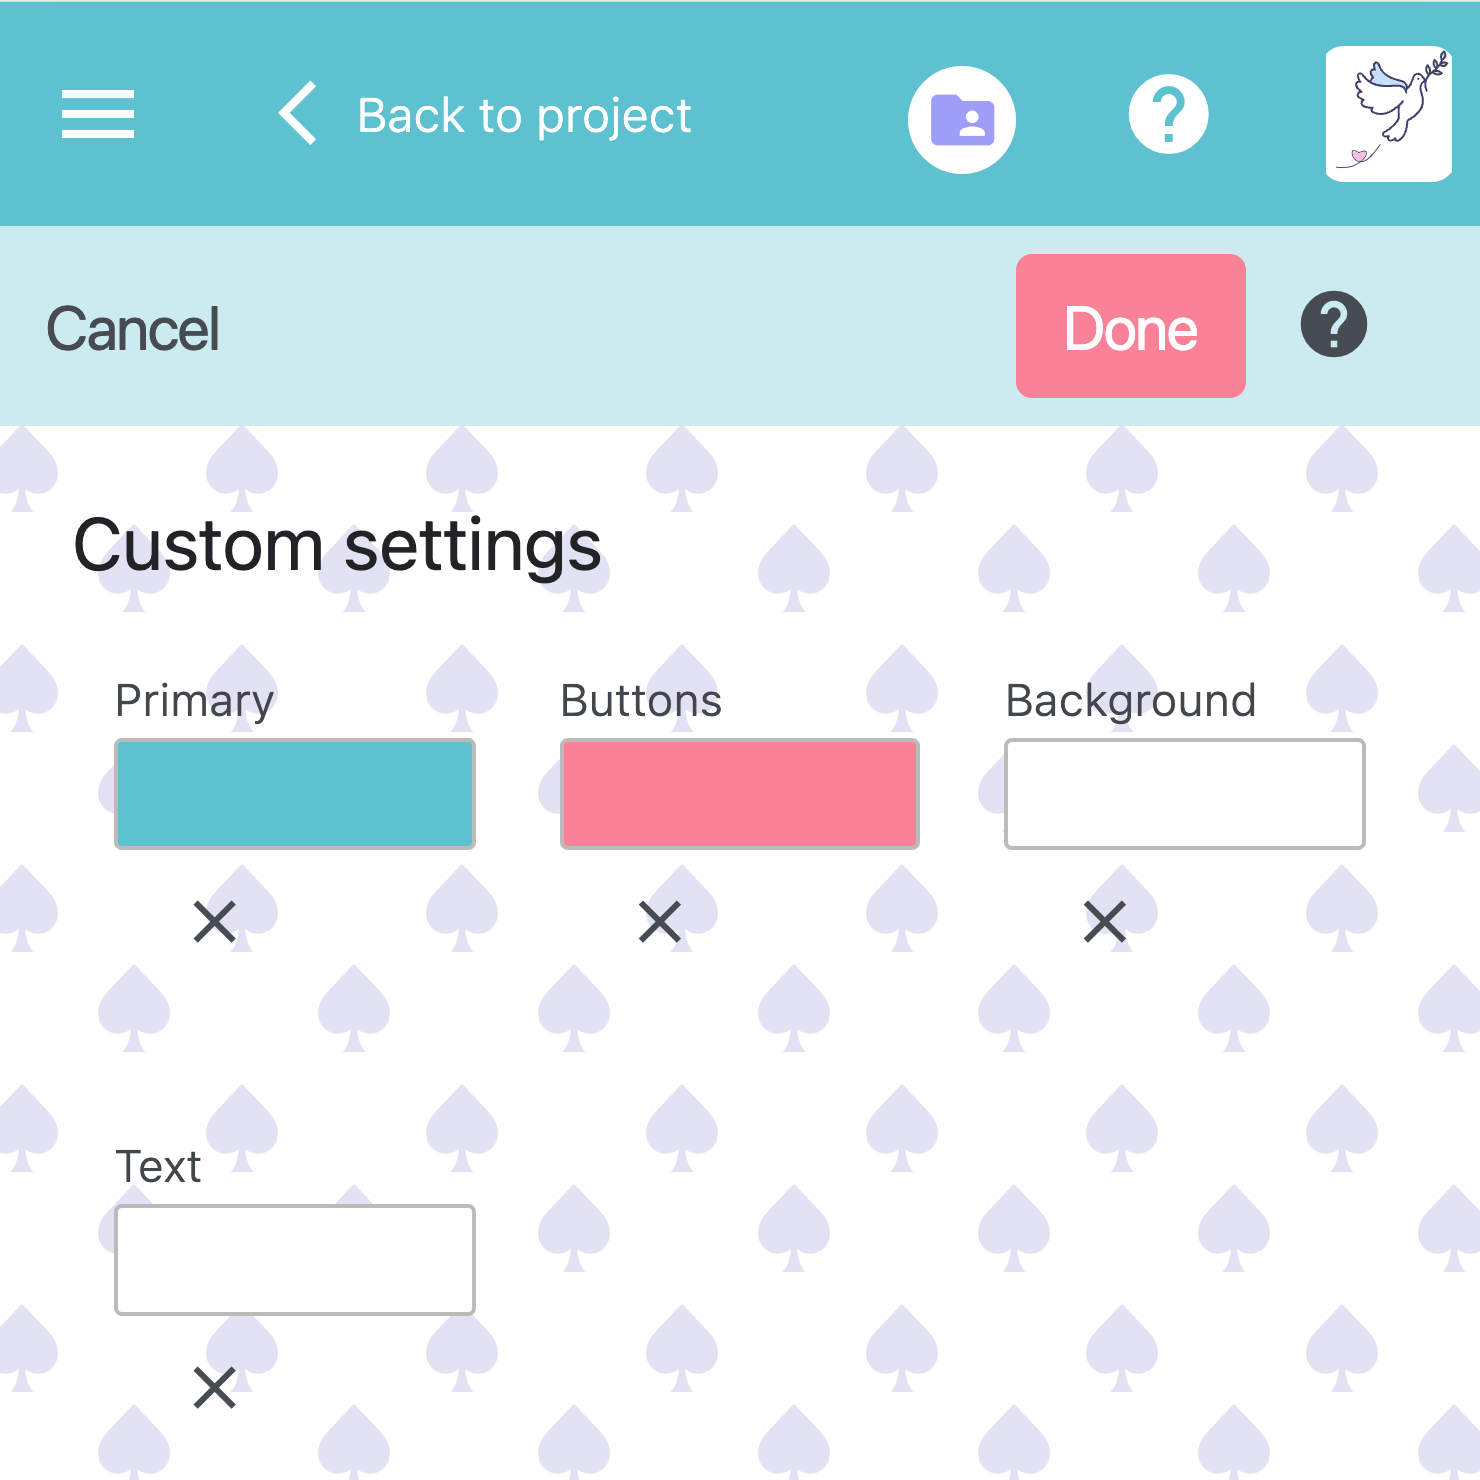
- Custom settings: You can choose the colors for the menu bar, buttons, background, and text color of the menu bar from a selection of colors. Press X to remove custom colors and revert to the automatic color scheme.
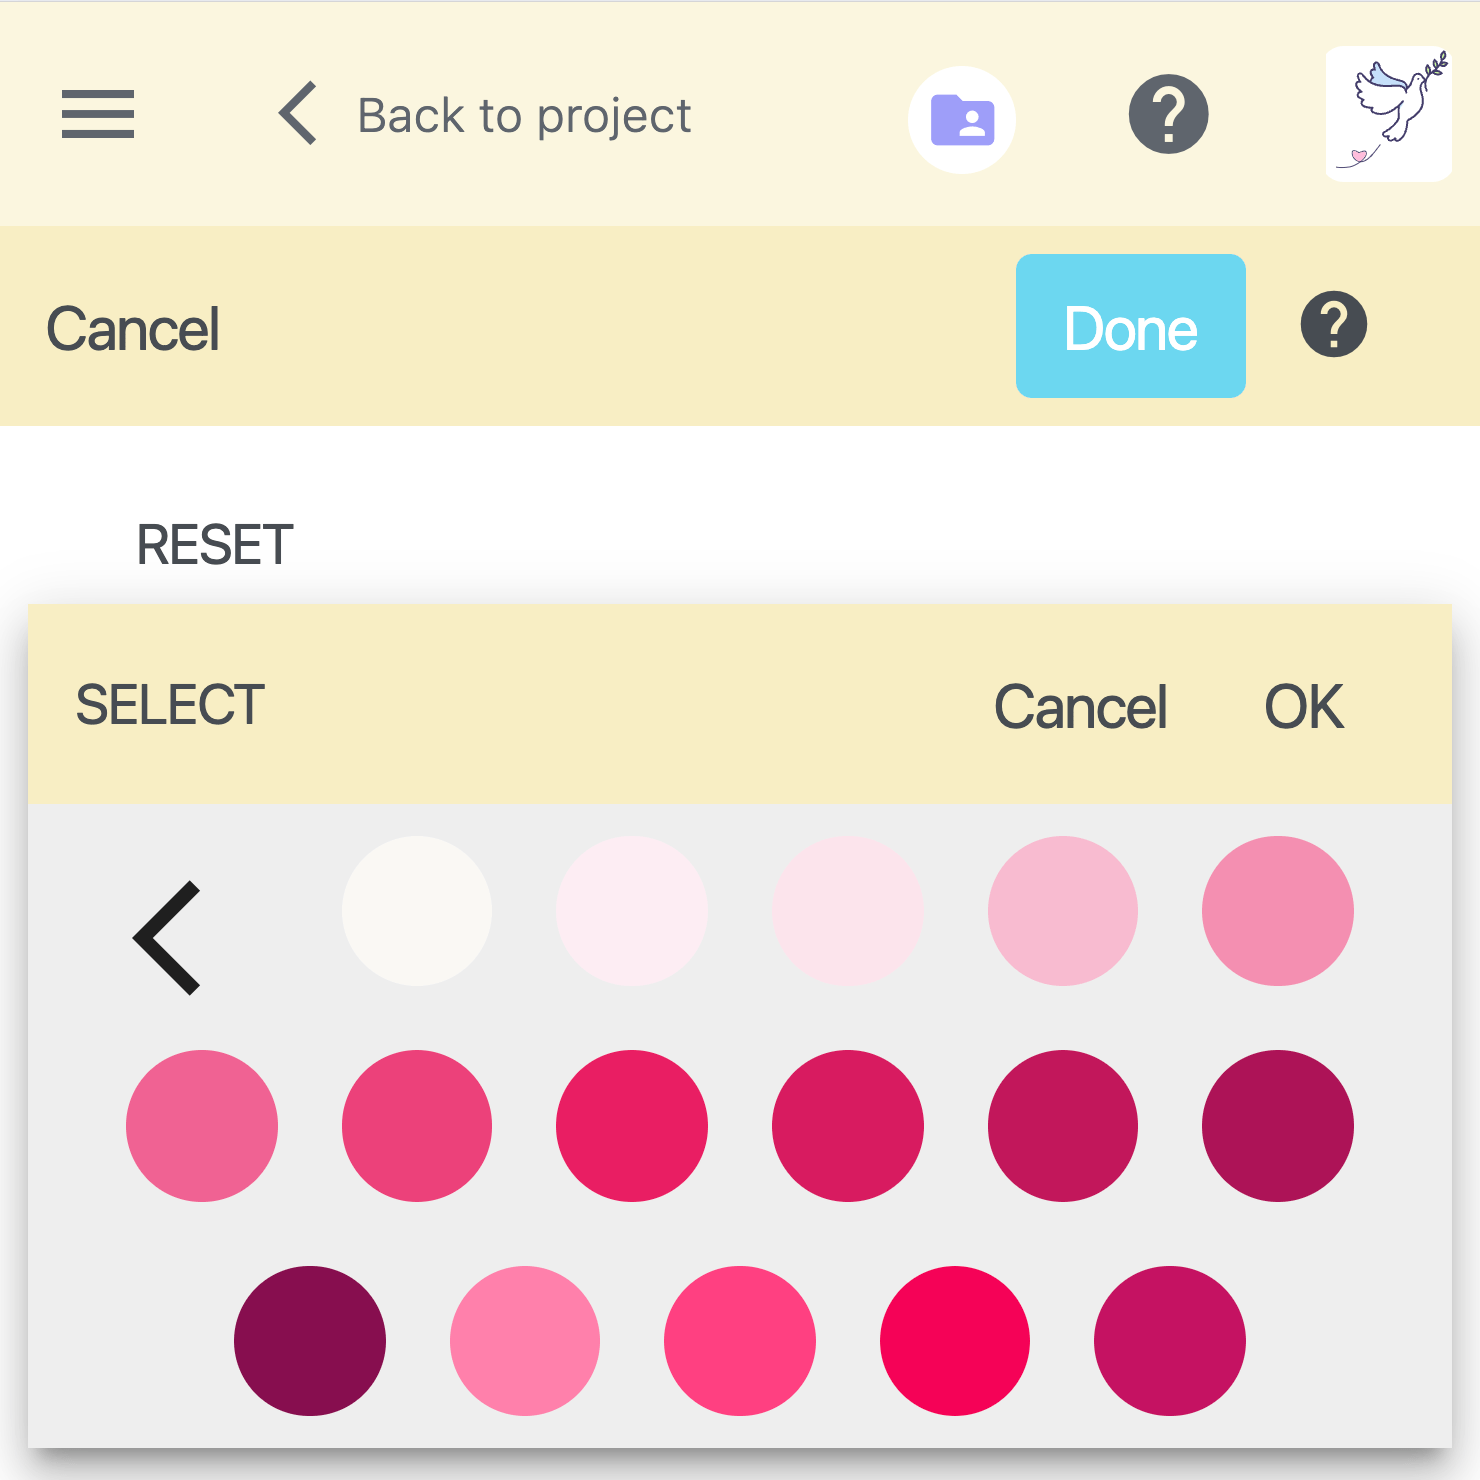
- Background images: Set a background image. Using dark-colored images may make the text color hard to read. Press Clear to remove the background image. Moving the transparency slider lightens the text background, allowing the background image to show through. Enjoy beautiful background images.
These inspiring works are generously provided by the creators for free use, with credits and links provided at the bottom of the page. If you find an image you like, feel free to use it for work or personal projects. Donations to these sites, as well as requests for work, are also welcome.
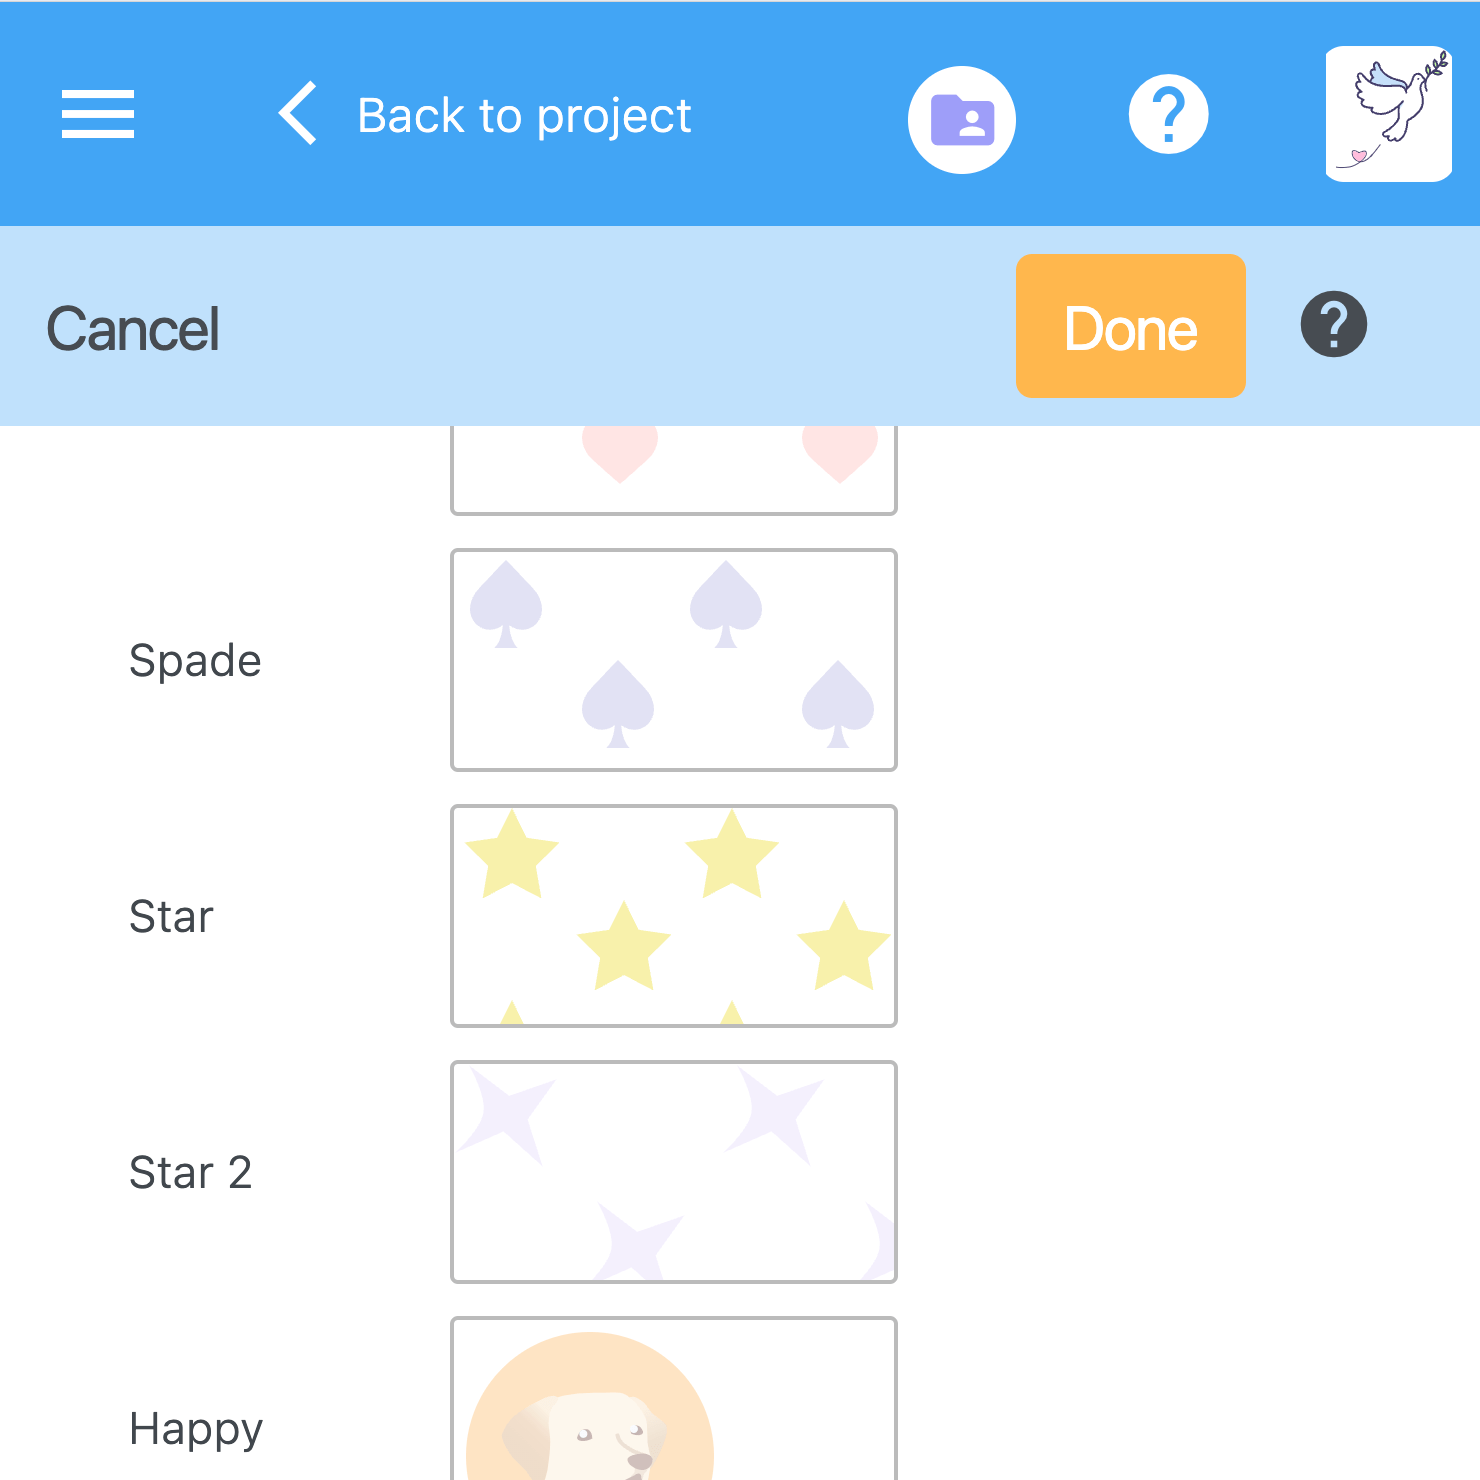
- Background image link: Setting a link to an image on the internet will use it as the background image. Using dark-colored images may make the text color hard to read. When the repeat switch is turned on, the image will be displayed repeatedly. Instead of linking directly to images on stock sites, please upload the image to a shared file with public access enabled, and set that link here.
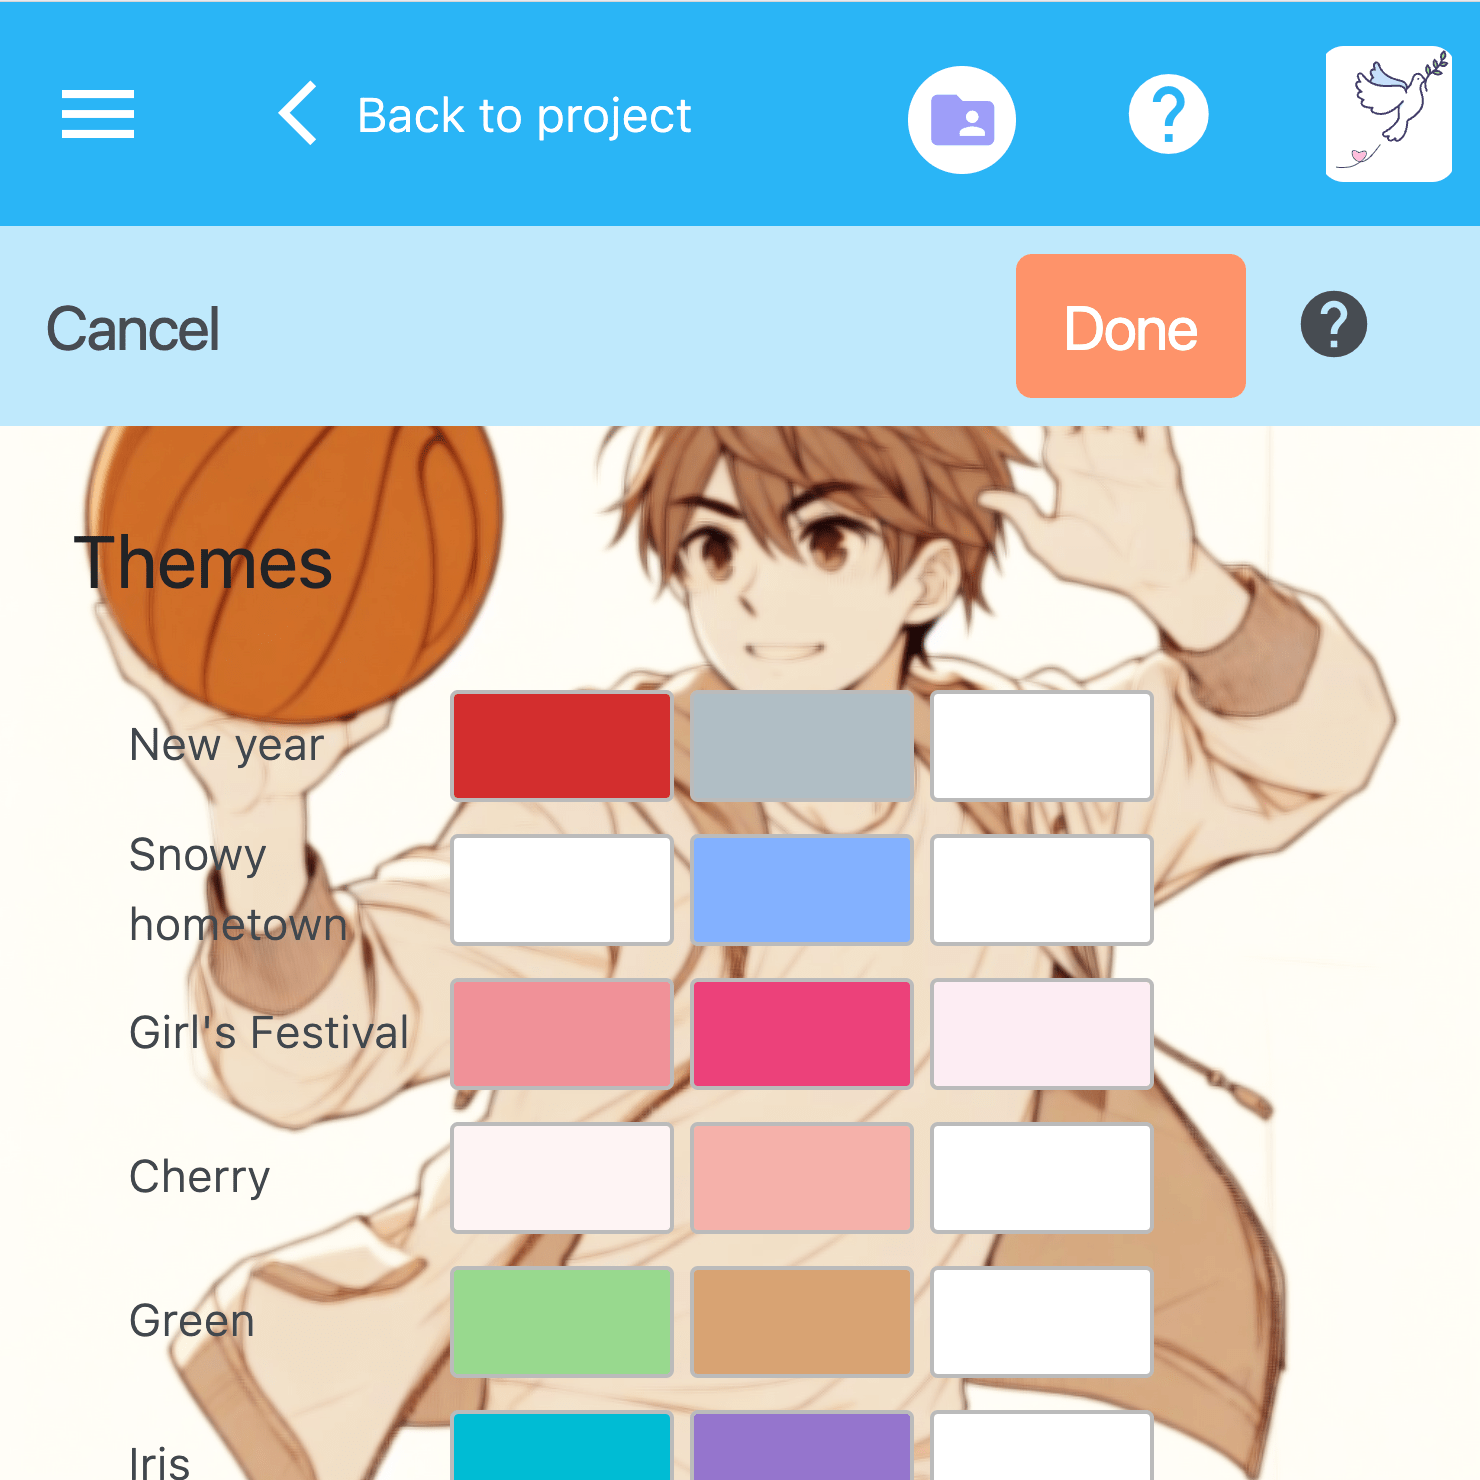
- App title: Set the text to display at the top of the app. You can decide the purpose freely, such as the company name or this month's slogan. '$project-title' will display the current project name.
- Theme: You can apply custom colors to the menu bar, buttons, background, and menu bar text. Additional colors are selected from an automatic color scheme based on the menu bar color. Our recommendation is 'Miss Branche' and 'Default'.
-
person User's public profile
Confirm user's public profile. Your public profile is visible to anyone. For your safety, be careful not to disclose anything you don't need to.
The logo image will be displayed to your peer during message sessions. If both a user's public profile and an organization's public profile have logos, the logo from the user's public profile will be used as a priority.
You are recommended to use your facial photo for your logo image. Trust is the most important thing, but logos such as animals and illustrations don't earn trust. Don't use someone's facial photo.
If you are a seller and you think your facial photo is not good at sales, you can remove your logo on user's public profile so that the organization's logo will be used.
You can write your nickname, name or stage name in the nickname field. But don't write someone's name because that is strongly prohibited. Your country, region, and purchase history including the number of past requests and purchases can be shown.
User's public profile for an organization user accounts allow you to write a lot. That is for jobs like lawyers and consultants. Also, if you set it to searchable and specify "Location and business area", it will appear in the search results on the "Search for shops and organizations" page (in plan).
In closed message sessions, you can view peer's name, Land ID and IP address for safe trade. You show the same to your peer. (You can know peer's IP address on an email as well.)
-
compare_arrows Switch user accounts
"My user accounts" list on the user menu shows your linked user accounts. When you have a message in another user account, you will see an unread badge. On a desktop PC you will see the list of the Land IDs at lower right corner of the screen.
By pressing one, you can switch to the user account.
If you turn off "Quick User Switch" in the user's basic settings, passkey authentication will be required every time you switch users.
If the organization’s administrator turns off "Allow Quick User Switch" in the organization’s settings, passkey authentication will be required for all users in the organization each time they switch users. However, unlike passwords, passkeys have a lower risk of being reused or leaked, so only turn this off if there is a compelling reason to impose this inconvenience.
-
merge Add a user account to "My user accounts" list
(This feature is currently unavailable.)
When you create a new user account and sign in at the first time, the user account is automatically linked with your existing user accounts and you will see them on "My user accounts" list in many cases.
If the automatic link does not occur, you can add by yourself.
To add a user account to your "My user accounts" list, press small "merge" button next to "My user accounts" on the user menu.
Enter the Land ID of the account, then press Send. The account and its linked accounts will be shown on your "My user accounts" list.
To create a new user account, register a new organization or ask an administrator of an organization to create a user for you.
If you delete a user account, it will disappear from the list.
-
share Share the page, open QR code
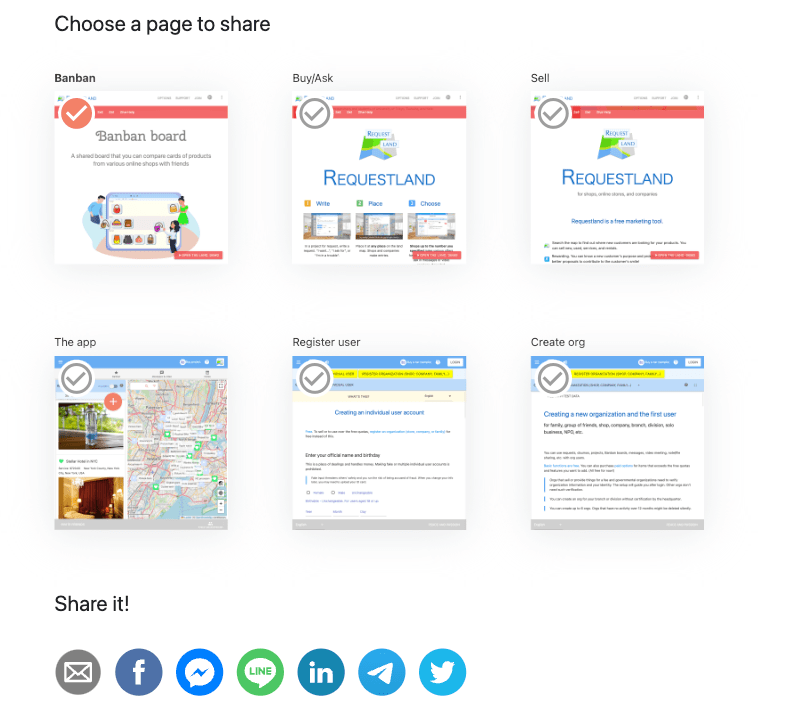 Share Requestland
In the user menu, pressing "Share this page, open QR code" allows you to:
- Share Requestland
- Share the current page or send a QR code to other users in the same organization
- Open the page by scanning the QR code
If an organization administrator wants to invite users to the organization, they should press " Add a user to this organization" in the user menu.
-
Choose, create, or delete projects
Projects is a way to put contents such as requests and Banban Boards together for specific purposes and people. "Project for a new house", "Project for Mary and John", "Osaka branch", and "2023" are typical usages of the projects.
To switch projects, press the project button shown near the top right corner of the screen. Choose a project on the project list to move on to the project.
In standard mode you cannot create a new project. Use "Buy Project 1" for requests, Banban Boards, and doumos. Use "Sell Project 1" for sell.
In expert mode you can create new projects for your purposes. To view the project list always on a large screen and switch projects quickly, turn on "Show always" switch on the project list page.
Only organizations that registered sales can sell.
Notifications are per project, so you can setup so that notifications for "Project for Mary and John", for example, will not go to other people. To turn on and off notifications for you, press the notification switch notifications_active on the right side of a project title.
To change the name or properties of a project such as notifications for other users, press Edit, then choose project to open the project settings page.
To delete a project, press the "Delete project" button on the project settings page.
You can open the project settings page from the extended menu button more_horiz or more_horiz as well.
-
notifications Notifications and Email
You can edit settings for banner notifications and email on the "Notification, email" on the "User menu".
You will receive notifications for other accounts by turning on Notify on other accounts in “My User Accounts” as well.
If you set "Receive notifications for this project" in a project settings, you will be notified by email or push. To change the notification settings, change "Receive notifications for this project" on the project setting.
If you set "Receive notifications for this project" in a project settings, when someone adds a new item to the list, it will automatically appear and be marked as unread.
In projects where notification settings are turned off, the screen will not update automatically. On a smartphone, pull the list down to reload it. On a desktop, please reselect the list mode. To reload a view, press its title.Notification compatible devices are as follows. In many cases, the browser will display "Do you want to allow notifications?", so press Allow. If you want to change the rejected setting, see the setting method link below.
Even if you have set to receive notifications, they will stop after one month of inactivity. By using Requestland, you will start receiving notifications again.
You may need to restart Requestland after changing the browser settings.
- Android-Chrome
- Windows-Chrome
- Mac-Chrome
- Mac-Safari (Ventura or later)
- Mac-Firefox
- App installed from iOS Safari: iOS Settings app, "Notifications," "Requestland"
- App installed from Android Chrome: Android Settings app, "Apps," "Requestland," "Notifications"
- App installed from Mac/Windows Chrome: Requestland app's top bar "more_horiz", "App info," "Notifications"
- App installed from Mac/Windows Edge: Requestland app's top bar "more_horiz", "App settings," "See permissions for request.land," "Notifications"
- App installed from Mac Safari: Select the Requestland app, OS top bar "Requestland," "Settings," "Privacy," "Notification settings"
On iOS-Safari, you need to Add to Home Screen (Install web app).
Attention: iOS16.4 or higher is required.
If the app is installed, an unread badge is displayed on the app icon. On Android, the number of unread badges corresponds to the number of unread notifications. On other platforms, it represents the number of unread items in Requestland.
In the following environments, you can receive notifications even if the app or browser is not running. Otherwise, notifications are received only when the app or browser is running.- Android: Chrome and apps installed from Chrome
- iOS: Apps installed from Safari
- Windows: Apps installed from Edge
- Mac: Safari and apps installed from Safari
The unread badge on the app icon is displayed even if the app is not running in the following environments. Otherwise, it is displayed only when the app is running.- Android: Chrome and apps installed from Chrome
- iOS: Apps installed from Safari
- Mac: Apps installed from Safari (badge counts are updated only when the app is running)
If you sign out, you will no longer receive notifications or badges. Stay signed in to continue receiving notifications.
Choose whether to automatically hide notifications or keep them displayed
macOS: In macOS System Settings, go to "Notifications," select Requestland, and choose either "Banners" or "Alerts."
iOS: In iOS Settings, go to "Notifications," select Requestland, and choose either "Temporary" or "Persistent" under "Banner Style."
Difference in Notifications between OS and Browser
Opening Requestland Opening browser Not opening browser OS sleep Android Chrome Y Y Y Y Android Requestland app installed from Chrome Y Y Y Y iPhone Safari N N N N iPhone Requestland app installed from Safari Y Y Y Y Windows Chrome Y Y N N Windows Edge Y Y Y N macOS Safari Y Y Y N macOS Chrome Y Y N N macOS Edge Y Y N N macOS Firefox Y Y N N -
notifications Notification sound
Notifications for video sessions and new messages will sound according to user settings and OS settings. Incoming video calls will ring three times.
If you want to stop notification sounds, turn off "Notify with sound" in "Notification, email" under User settings.
If notification sounds are not playing, please check your OS notification settings, "silent mode", "do not disturb mode", and "focus mode" settings.
In Chrome for macOS or Edge for macOS, the sound will only play when Requestland is running.
-
mark_email_unread Unreads
Unread marks disappear when you check the contents. Even if you do not check the contents, it will disappear after one week or more. Requestland doesn't show unreads on projects with notifications turned off.
If you are signed into one of your accounts, you will receive unreads and notifications for all accounts. A badge will appear at the top right corner of the screen on mobile, and at the bottom right of the screen on tablets and desktops.
In a list of messages and videos, pressing an unread badge will remove the unread badges from all messages.
The number of unread badges displayed on the app icon is only updated while the app is active.
-
event_note Notes
You can write a title, summary, content, category, and version in a note and share it within your organization. If you specify a summary image, it will appear at the top of the page.
Among these, only the title is required. The title and summary appear in the note list. The category and version are optional, and users can decide how to use them.
Web Clipping
You can copy and paste product descriptions or reviews you find on the web.
When you paste content or tap a pasted block, the following buttons will appear:
- Make editable
- Makes the block editable. If you do not press this button, you can move the block as a unit.
- Plain text
- Pastes the content as plain text.
You can also paste images and videos, but they are not copied into Requestland. If the original file is deleted, they will no longer be visible.
Collaborative Editing
When you and other users in your organization open the same note at the same time, collaborative editing starts automatically. Any changes you make will appear on the screens of the other users, and any changes they make will appear on yours.
Note: Everyone editing at the same time must save their changes. If anyone cancels, the changes made by all participants will be canceled.
-
chat MessagesSee Messages.
-
Video meetingSee Video meeting.
-
cloud_circle Shared filesSee Shared files.
-
keyboard Shortcut keys
Edit item
+ Open a new item to create. CTRL-Enter Sends the editing item to the server. Same as the Done button and the Send button. Dialog
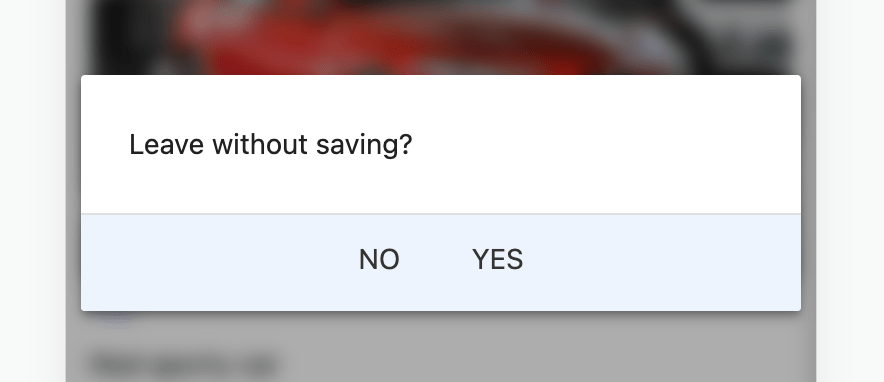
y Yes, OK。 n or Esc No, Cancel -
text_format Rich text editor
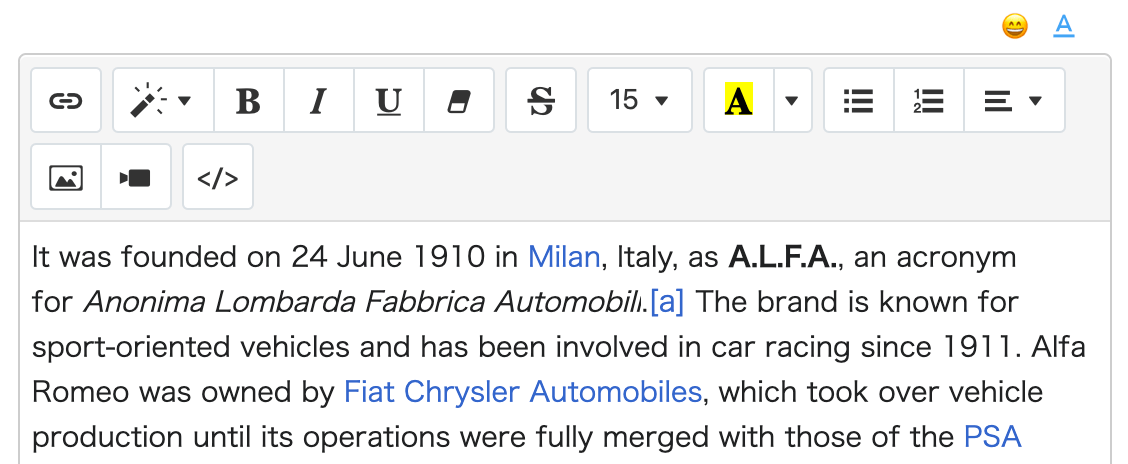
To embed an image in the shared folder in the rich text editor, save the image in the shared folder in advance and specify its public link when inserting the image.
Windows
CTRL-K Insert link Style CTRL-0 Paragraph CTRL-1 H1 header CTRL-2 H2 header CTRL-3 H3 header CTRL-4 H4 header CTRL-5 H5 header CTRL-6 H6 header CTRL-B Bold CTRL-I Italic CTRL-U Underline CTRL-BACKSLASH Erase style CTRL-SHIFT-S Strike through CTRL-SHIFT-L Align left CTRL-SHIFT-E Align center CTRL-SHIFT-R Align right CTRL-SHIFT-J Align justify CTRL-SHIFT-7 Unordered list CTRL-SHIFT-8 Ordered list CTRL-[ Indent back CTRL-] Indent Picture Video Code ENTER New line Shift-ENTER Insert paragraph CTRL-ENTER Done or Send CTRL-Shift-ENTER Horizontal line ESC Escape CTRL-Z Undo CTRL-Y Redo TAB Tab SHIFT-TAB Tab back Mac
CMD-K Insert link Style CMD-0 Paragraph CMD-1 H1 header CMD-2 H2 header CMD-3 H3header CMD-4 H4header CMD-5 H5header CMD-6 H6header CMD-B Bold CMD-I Italic CMD-U Underline CMD-BACKSLASH Erase style CMD-SHIFT-S Strike through CMD-SHIFT-L Align left CMD-SHIFT-E Align center CMD-SHIFT-R Align right CMD-SHIFT-J Align justify CMD-SHIFT-7 Unordered list CMD-SHIFT-8 Ordered list CMD-[ Indent back CMD-] Indent Picture Video Code ENTER New line Shift-ENTER Insert paragraph CTRL-ENTER Done or Send CTRL-Shift-ENTER Horizontal line ESC Escape CMD-Z Undo CMD-Y Redo TAB Tab SHIFT-TAB Tab back -
sentiment_very_dissatisfied When you accidentally delete an item
Sometimes you may enter a long piece of text and accidentally delete the item.
Unfortunately, there is no way to restore it. However, if it happened just after entering and deleting the text, the data may still remain in the logs. Copy the text from there and recreate the item.
-
admin_panel_settings Standard mode and expert mode
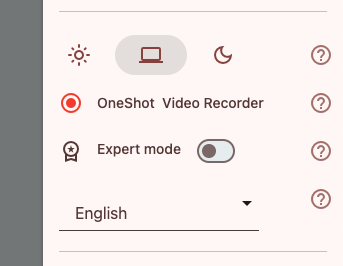
In the expert mode you can create new projects, but not in the standard mode.
On a PC in the expert mode, the project list and the project menu can be always displayed and you can switch projects by a touch. In the standard mode, you need to move to the project list page once to go to another project. Switching menu is also need to transit a menu page.
In the expert mode, side menus are displayed, while menu pages is used in the standard mode.
In the expert mode, you can request new, used, services, etc. in a request, while you can request only one kind in the standard mode.
-
Manage passkeys
When you create a passkey, the private key part of the passkey is stored on your device(s), and the public key part is stored on the Requestland server. These are generally referred to collectively as a passkey, but depending on the context, it's important to distinguish between the passkey on your device(s) and the passkey on the Requestland server. If you delete one, you must delete the other as well.
The device's passkey is managed through the device's password manager. On devices that support passkey synchronization, such as Apple, Android, and Chrome, deleting the passkey from the device will delete it from all devices.
Android: Settings -> Passwords & Accounts -> Google Password -> request.land
iOS: Settings -> Passwords -> request.land
The server's passkey is managed through the Passkeys option in the user settings menu.
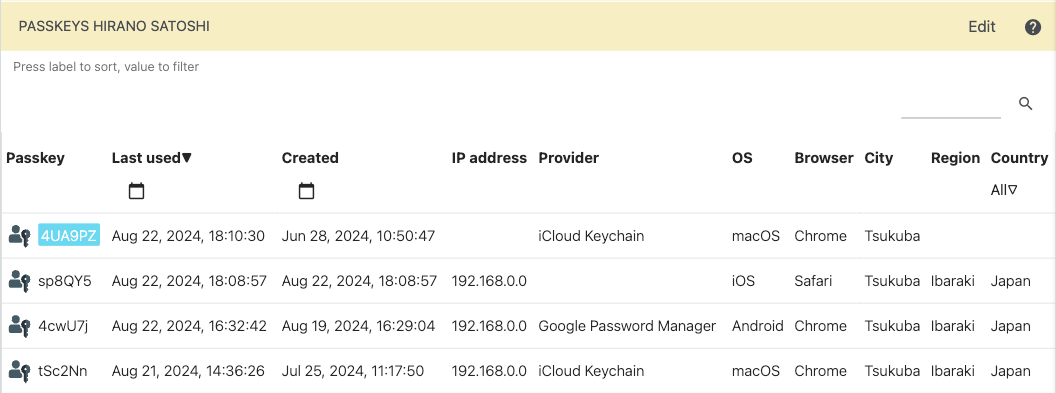 Passkey List
The passkey list shows the passkeys you have. You can sort the list by clicking the header and filter by clicking items within each row.
Click the icon to view details.
If you want to delete a passkey, press the edit button. Select the row and click the delete delete button. You cannot delete the passkey currently used for sign-in.
Even if the passkey remains on the device's sign-in screen, you won't be able to sign in if the server's passkey is deleted.
-
safety_check Sign-in history
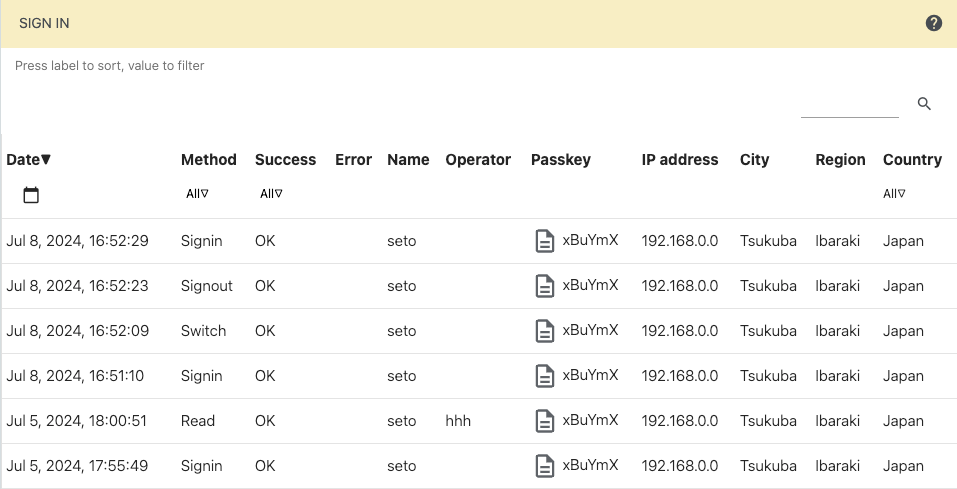 Sign-in history
To view your sign-in history (logs), go to the user settings menu and press the safety_check Sign-in History button. As the list is long, you may need to scroll horizontally or turn your device sideways.
Logs are saved for 24 hours. With the Security management option, records can be kept for up to 10 years.
Pressing on a table header will sort the table in ascending or descending order. Pressing on a value will display only the rows containing that value. Pressing multiple values will perform AND searches. String search places a very high load on the server, so please try to use the table values for searching whenever possible.
The Method column of the table represent the following actions. Note that searches are not recorded. Failed actions are marked as "Failed" in the Success column. If an action is performed by someone other than the user, the operator’s Land name is displayed in the Operator column.
Sign In Sign In Sign Out Sign Out (does not include expiration of sign-in session) Switch In Switch user account into this organization Lockout Temporarily denied passkey creation due to identity mismatch Create Create passkey Delete Delete passkey Read Refer passkey Merge Add user account to the account list Countries and regions are roughly inferred from IP addresses, and this is especially inaccurate from mobile phones.
Press the description button to display log details and data content. In read or delete logs, it displays the data that the user was supposed to see. The data itself is not saved in the refer logs; instead, it shows the last saved data before the refer action. If the log is deleted and cannot be found, it will display "Referencing data is out of log range".
Things to watch out for
If there is a lockout for passkey creation from a completely unknown location
Someone attempted to generate a passkey using your LandID. They read the identity verification email and tried to register the passkey from the link provided, but since the birthday didn’t match, RequestLand temporarily stopped the passkey creation. Someone might be trying to hijack your account. It's highly likely your email account password has been compromised, so you should change your email account password. (10 billion passwords leaked online)
If there is an OK for passkey creation or sign-in from a completely unknown location
Your birthday and email account password have been leaked, and your user account has been hijacked. Delete any unfamiliar passkeys on the passkey page from the user settings. Also, you should change your email account password. (10 billion passwords leaked online)
-
delete Leave the organization and delete the user account
User accounts are managed by the organization's administrators. Administrators refer to Delete or manage users.
Users who are not administrators cannot withdraw or delete their own accounts. This is to prevent issues, such as employees deleting their accounts in a company. Please contact your organization's administrator.
For instructions on how to leave Requestland, please refer to Delete organization / Withdraw from RequestLand.
Even if your user account is deleted, the data you created will remain. The associated Land IDs and Land Names will also remain. Regarding your name, some data will be labeled as "Deleted user" while other data may retain your name. Please delete any necessary data as needed.
-
radio_button_checked OneShot Demo Video Recorder
-
wifi_off Offline use (beta testing)
By "Install Requestland app on the home screen", you can use the Requestland app even when offline.
Example: Even when you lack an internet connection, such as during travel, you can still access your Banban Boards.
Conditions and limitations for offline use:
- Within the app on that device, you can only view lists and items that the last accessed user opened within the past 7 days.
- Functions like sign-in, sign-out, user switching, editing, adding, or deleting items, and clearing unread badges are not available.
- Due to device updates, restarts, or the device's automatic file management, there might be instances where you can't view lists or items even if they were accessed within the past 7 days.
-
free_breakfast Short break, open and close time
Requestland is a place for people to interact each other. It is necessary to match the activities with other persons. So, there is a seven-minute break every hour and a nighttime closure, as health could be compromised if you don't take a proper break.
For health and well-being, Requestland closes at approximately 7:30 PM for sellers and closes at 10:00 PM for requesters. It opens at 7:00 AM in the morning. Because the opening and closing occur according to the rotation of this planet, the actual time depends on your location.
Sellers may close their business much earlier than Requestland does. You may not hear from them until the next business day or later.
-
check_circle_outline When the application is unstable
Please try the following when the operation of the Requestland app is unstable.
- Exit and restart the app. Or reload the app.
- Sign out and sign in again. The most of browser's temporary storage (cookies and localStorage) is also cleared.
- Move to the project list and open the project again.